

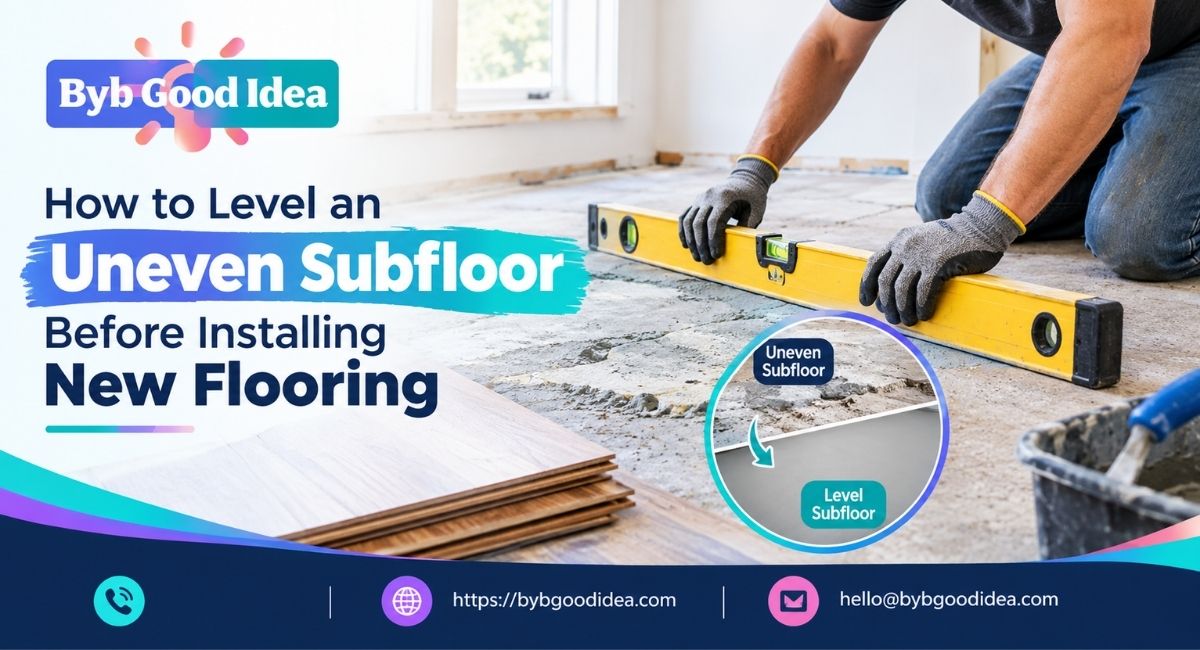
You pull up the old carpet and the floor looks fine. Then you roll a marble across it. The marble drifts to one corner and stops in a dip. That dip will not stay hidden. It will show up as a soft spot under vinyl plank, a gap in laminate, or a squeaking board in hardwood.
An uneven subfloor is one of the most common problems in a flooring project. It is also one of the most fixable. You do not need special skills. You need a long straightedge, a pencil or chalk, a clear plan, and the patience to measure before you fix anything.
This guide shows you how to level a subfloor step by step. You will map the low spots, work out why they exist, and choose the right fix. The options are sanding, shimming, patching or pouring. You will also see what flatness your flooring maker expects, because that number decides how much work you really need to do. If you are still choosing a floor, the DIY flooring ideas on this site can help you narrow it down before you start prepping.
Why a Flat Subfloor Matters More Than the Flooring Itself
New flooring does not hide problems. It copies them. A thin vinyl plank follows every dip and ridge below it. A click-lock floor flexes at its joints when the base is wavy, and that flexing breaks the locking edges over time.
Here is what a bad subfloor does to common floor types:
- Floating vinyl plank and laminate: joints open, edges lift, and the floor feels hollow underfoot.
- Solid and engineered hardwood: boards rock, nails loosen, and squeaks start.
- Tile: lippage appears, which means one tile edge sits higher than the next. Grout also cracks above flexing areas.
- Sheet vinyl: ridges and low spots telegraph through the surface as visible waves.
There is also a warranty issue. Most flooring makers state a flatness limit in their installation guide. If your floor fails because the subfloor was outside that limit, the claim can be refused. So leveling is not just about looks. It protects your money.
How Flat Does a Subfloor Need to Be?
The short answer: most manufacturers want no more than about 3/16 inch of variation over 10 feet, or about 1/8 inch over 6 feet. In metric terms, that is roughly 5 mm over 3 m, or 3 mm over 2 m. These numbers are typical, not universal. Your flooring guide is the final word.
The National Wood Flooring Association (NWFA) publishes subfloor flatness guidance for wood floors in the USA. Its common standard is 3/16 inch in 10 feet for nail-down wood floors, and some floating products allow slightly more. You can review installation guidance at the NWFA website.
Here is a general guide. Always confirm against the paperwork that came with your product.
| Flooring type | Typical flatness limit (check your brand) | Why it is strict |
| Floating vinyl plank (LVP) | 3/16 inch in 10 feet, or 1/8 inch in 6 feet | Click joints can crack or open when the floor flexes |
| Laminate | 3/16 inch in 10 feet, sometimes 1/8 inch in 6 feet | Locking edges are brittle and need a stable base |
| Solid hardwood (nail down) | 3/16 inch in 10 feet | Boards need full contact to hold nails and avoid squeaks |
| Engineered hardwood (floating or glued) | 3/16 inch in 10 feet, sometimes tighter | Thin top layers can show gaps or cup |
| Large format tile | 1/8 inch in 10 feet, often stricter | Lippage shows quickly on big tiles |
| Sheet vinyl and carpet | More forgiving, but ridges still show | Thin sheet copies the surface below |
In the UK, many manufacturers ask for around 3 mm under a 2 m straightedge for rigid and floating floors. Some resilient floors ask for less. Again, read the instructions for your exact product.
One more point. These limits describe gradual change, not sudden bumps. A 1/8 inch ridge that rises and falls over 6 inches is far worse than a 1/4 inch slope that spreads across 10 feet. Sharp ridges break click joints. Gentle slopes are usually less of a problem for floating floors, though they still matter for tile and wood.
Before You Start: Safety, Moisture and Structure
Do a few checks before you grab a sander or a bag of compound. These steps take an hour and can save a failed job.
Check what is already down
If you are removing old tile, vinyl or adhesive in a home built before the 1980s in the USA, or before 2000 in the UK, test for asbestos before you sand or scrape. Old vinyl tiles, black mastic adhesive and some backing papers can contain it. A lab test is inexpensive. Do not guess. If the test is positive, stop and call a licensed abatement contractor.
Sanding old paint or finishes in older homes can also release lead dust. Use a lead test kit and follow local guidance if you find it.
Check moisture
Moisture is the quiet failure. A plywood or OSB subfloor above a damp crawlspace can swell and shrink with the seasons. A pin-type moisture meter costs little and gives a fast reading. Most flooring makers want wood subfloors below about 12 percent moisture content. They also want the reading to be close to the moisture level of the new floor. If your readings are high, fix the cause first. Leveling a wet floor only traps the problem. If your problem is in a lower level, the guide on how to waterproof a basement without professionals covers the first steps for controlling water at the source.
Check the structure
Walk the room. Listen for squeaks. Look for gaps between the plywood and the joists, loose boards, and any bouncing. A subfloor that moves cannot be leveled. Compound will crack over movement, and shims will compress. Get it solid first.
Gather your tools
You do not need a lot. This list covers most jobs:
- A straightedge that is at least 6 feet long, ideally 8 to 10 feet (a long level or a straight length of aluminium works)
- A pencil, chalk or a carpenter’s crayon
- A tape measure and a feeler gauge or a stack of coins for measuring gaps
- A belt sander or floor grinder, plus a dust vacuum and a mask
- Drill, screws and a screw gun
- A rubber mallet, a trowel and a long-handled squeegee or gauge rake
- Primer, metal lath or mesh if the product requires it, and a drill mixer
If you are building your kit from scratch, this guide to essential woodworking tools for beginners covers the basics you will use here, from levels to drills.
How to Find the Low Spots with a Straightedge and Chalk
This is the heart of the job. Do not skip it. Many people pour compound over the whole room without measuring. They waste money and still miss the low spots.
Step 1: Clear and clean the floor
Remove all old flooring, staples, nails and adhesive lumps. Sweep and vacuum. A single staple under your straightedge will give a false reading.
Step 2: Set up your straightedge
Use a rigid straightedge. A cheap bendy board will sag in the middle and lie to you. A 6 foot level works. A 10 foot length of straight aluminium is better, since it matches the 10 foot standard that many brands use.
Step 3: Sweep the room in a grid
Lay the straightedge on the floor. Start at one wall. Move it across the room in rows about 2 feet apart. Then repeat the process at right angles. Also check diagonally. This grid catches dips you would miss if you only went one way.
At each position, look under the straightedge for light. Slide a feeler gauge or stacked coins into the gap to measure it. A US quarter is about 1/16 inch thick, so three quarters is about 3/16 inch. In the UK, a 2 pence coin is about 2 mm thick.
Step 4: Mark what you see
Use different marks for different problems:
- Circle low spots and write the depth inside the circle, such as “3/16”.
- Draw an X over high spots, and write how high they rise.
- Draw a line along any ridge, such as a plywood seam that sits proud.
- Mark any squeaks or soft areas with a different colour so you remember to fix them first.
Step 5: Look at the whole picture
Step back and look at the chalk map. You will usually see one of four patterns:
- A few isolated dips. These are local problems and are easy to patch.
- A few isolated high spots. These are usually joints or fasteners, and you can sand them down.
- A long, gradual slope across the room. This is a structural or settling issue.
- A wavy floor with high and low zones. This often points to joists that sit at different heights.
Photograph the map from a standing position. Photos help you compare before and after, and they help if you ever need to talk to a flooring rep.
A quick backup: the marble and laser test
If you do not have a long straightedge, a marble or a small ball will show you where water would run. For larger rooms, a self-levelling laser level set at floor height gives a clear picture. Measure down from the laser line at a grid of points and write the numbers on the floor. The spread between the highest and lowest reading is your total variation.
Why Is the Subfloor Uneven in the First Place?
You should know the cause before you choose the fix. Treating symptoms alone can bring the problem back.
Joists at different heights. Floor joists are the beams that carry the subfloor. If one is slightly lower or higher than its neighbour, the plywood above follows that change. This is common in older homes where lumber was not graded as tightly as it is now. It can also happen when joists are spliced or notched for plumbing.
Joist sag. Joists that are too long for their size, or that carry too much weight, can deflect over time. If you suspect this, check your span against a reliable chart. The floor joist span table on this site shows how far common lumber sizes can span for typical loads. Heavy sagging is a structural problem, not a flooring problem, and may need a structural engineer or a builder.
Plywood seams and fasteners. Sheets of plywood or OSB can sit at slightly different heights along their edges. Nails that have backed out, or screws driven too deep, also create small bumps and dips.
Moisture and swelling. Wet OSB can swell at its edges. Even after it dries, the edges may stay raised.
Settling and shrinkage. Wood shrinks as it dries. In older houses, joists, beams and sill plates can settle unevenly over decades.
Loose boards. If the subfloor is loose, it can sag between fasteners and squeak when walked on. If squeaks are part of your problem, the guide to fixing squeaky wood floors walks through screwing down loose boards from above and below.
Sand, Shim, Patch or Pour: Which Fix Is Right?
Most floors need a mix of methods. Use this table to match the problem to the repair. Measure first, then pick the method with the least material and effort that still reaches your flatness limit.
| Problem | Typical size | Best fix | Notes |
| High spot, ridge or raised plywood seam | Up to about 1/4 inch | Sand or plane | Use a belt sander or a power planer. Vacuum all dust. |
| High joist causing a hump | Over 1/4 inch | Plane the joist or sister the neighbours | Needs access from below. May need a builder. |
| Small dip or low area | Up to 1/8 inch | Patch with a feather finish compound | Quick and cheap for small areas. |
| Medium dip or wide shallow area | 1/8 to 1/2 inch | Pour self-leveling underlayment | Best for large low zones. |
| Gap between plywood and joist | Any | Shim from below or add screws | Fix this before any surface repair. |
| Gradual slope across a room | 1/2 inch or more over the room | Add a plywood layer, shim, or pour deeper layers | Check the product depth limit. May need professional advice. |
| Loose or soft subfloor | Any | Screw down or replace the panel | Do not level over movement. |
The rule is simple. Remove high spots first. Fill low spots second. Never try to level a floor by only adding material, because that raises the whole surface and creates new height problems at doors and thresholds.
Fix 1: Sand or Plane the High Spots
Start here. Removing a hump is easier and cheaper than filling around it.
Plywood seams and ridges
A belt sander with a coarse 36 or 40 grit belt can take down a raised seam in a few passes. Work along the seam, not across it. Check often with your straightedge. Remove a little at a time, because you cannot put wood back.
Wear a good dust mask and use eye protection. Sanding OSB and plywood throws a lot of fine dust, and some boards contain glues that you should not breathe. Run a vacuum or a dust extractor if you can.
Do not sand so deep that you cut through the top veneer of plywood. If you do, the layer underneath may be weaker and can lift later.
High joists
If one joist sits higher than the rest, you can plane it from below, but only if you can reach it and the joist is not structural beyond a minor trim. Take off no more than about 1/4 inch. Anything beyond that may weaken the joist. If you need to remove more, a better route is to raise the neighbouring joists by sistering new lumber to them, or to call a builder.
Raised nails and screws
Hammer down any nail heads that stand proud. For screws, drive them below the surface. Do not leave heads standing up. Even a small bump under vinyl will show.
Fix 2: Shim and Support Low Spots from Below or Above
Shimming helps when the plywood has pulled away from the joist or when a joist is low.
Shimming from below
If you have access to the underside, such as in a basement or a crawlspace, you can slip shims between the joist and the subfloor. Use hardwood or composite shims, which do not compress. Tap them in gently until the floor above is flat when you check with your straightedge. Then add a construction screw through the subfloor into the joist to lock it in place. Cedar shingles are a common choice because they taper smoothly, but make sure they are dry and sound.
Shimming from above
If you cannot reach the underside, you can add layers of thin material. Felt paper, tapered underlayment strips or thin plywood patches can raise a low area. Glue and screw each piece so it cannot move. This works best for small, shallow dips. For larger areas, a pour is usually neater.
Adding a new plywood layer
For a floor with several problems, some builders add a new layer of 1/4 inch or 3/8 inch plywood over the old subfloor. Screw it down on a tight grid, usually every 6 to 8 inches, and stagger the seams so they do not line up with the old ones. This gives you a clean surface. It also adds height, so check door clearances, cabinets and transitions to nearby rooms before you commit.
Fix 3: Patch Small Dips with a Feather Finish
A feather finish is a cement-based patching compound that you can spread to a very thin edge. The name comes from the way it tapers to nothing at the boundary of the patch. It is made for small repairs. Brands such as Ardex and Mapei sell versions for concrete and, in some cases, for wood subfloors. Always check the label, since some products are for concrete only.
Here is the process:
- Vacuum the area and wipe it with a damp cloth to remove fine dust.
- Apply the primer the maker recommends. Do not skip this step. Primer controls how fast the wood absorbs water from the compound, which prevents weak spots.
- Mix a small batch with clean water in a bucket. Follow the ratio on the bag.
- Spread the compound with a flat trowel or a wide drywall knife. Work it from the centre of the dip out to the edges. Use light pressure and long strokes so the edge feathers out.
- Let it cure for the time listed on the label.
- Sand any ridges lightly with a sanding block, then vacuum.
- Check again with your straightedge. Add a second thin coat if needed.
Do not try to fill a deep hole with one thick layer. Thick layers can shrink and crack. Thin coats are stronger.
Fix 4: Pour Self-Leveling Underlayment
Self-leveling underlayment, often shortened to SLU, is a cement-based liquid that flows across the floor and settles flat. It is the best answer when a large area is low, or when the floor has many small dips spread across a room.
Ardex and Mapei both sell SLU products for wood subfloors. Look for one that says it is made for plywood or OSB. Some products are formulated for concrete only. A wood subfloor moves slightly with temperature and humidity, so the compound needs added polymers to handle that flex.
Step 1: Prepare the floor
The surface must be clean, dry and solid. Screw down any loose boards. Remove paint, wax and adhesive. Fill gaps and holes with a suitable filler, since liquid will leak through any opening. Seal the edges and around pipes with foam strips or sealant. Block heating vents and floor drains so the compound does not run into them.
Step 2: Install metal lath or mesh if required
Many manufacturers require expanded metal lath or a mesh over a wood subfloor. This reinforcement gives the compound something to grip and helps control cracking. Fasten the lath with staples or screws at the spacing shown in the instructions. Overlap sheets as directed. Skip this step only if the product label says it is not needed for your subfloor type.
Step 3: Prime
Apply the manufacturer’s primer. Use a roller or a brush, and let it dry to the required stage. On wood, one or two coats are common. Primer helps the compound bond and prevents it from drying too fast.
Step 4: Set up dams and tools
Build dams at doorways and edges using foam, wood strips or sealant tape. You want the liquid to stay in the room. Gather your tools before you mix: a drill mixer, a clean bucket, a gauge rake, a spiked roller and a helper if the room is large. SLU has a short working time, often around 15 to 20 minutes, so you cannot stop in the middle.
Step 5: Mix and pour
Measure the water carefully. Too much water weakens the compound and may cause cracks or dusting. Add the powder to the water, not the other way round, and mix to a lump-free consistency. Pour the mix onto the floor in a ribbon, starting in the farthest corner from the exit. Spread it with a gauge rake or a squeegee, and let gravity do most of the work.
Step 6: Roll and finish
Pull a spiked roller across the surface to release trapped air. Do this soon after you spread the mix. Do not walk on the wet compound, since footprints will leave marks. Work out of the room as you go, or pour in sections if the product allows it.
Step 7: Cure and check
Follow the label for curing times. Most products allow light foot traffic after a few hours and flooring after 24 hours or longer. Wait longer if the room is cold or humid. Test with your straightedge again once the surface is hard. Sand off any small nibs. Then check moisture before you install the floor. The new layer should be dry and stable.
Depth limits and layers
Each product has a minimum and maximum depth. Many wood-floor SLUs run from about 1/8 inch up to 1 inch or more. If your low spot is deeper than the maximum, add shims or extra plywood first, or pour in two layers with a primer between them. Never exceed the limit on the bag.
What About a Sloped Subfloor?
A slope is different from a dip. A subfloor that runs downhill across the room may come from settled footings, sagging beams or an addition that was built at a slightly different height.
First, measure the slope. Place your straightedge or a long level on the floor and measure the gap at the low end. A drop of 1/2 inch over 10 feet is common in older homes. Many people live with it and never notice. Whether you need to correct it depends on your flooring and your goals.
For floating vinyl plank and laminate, a smooth, steady slope often passes the flatness test, since the limit applies to local variation, not to overall tilt. Tile and hardwood are less forgiving. A steep slope can show at the edges of the room, where the floor meets walls and cabinets.
If you decide to correct a slope, there are three common routes:
- Pour a tapered layer of SLU, thick at the low end and thin at the high end.
- Shim the joists on the low side and sister them to the higher ones.
- Add a sloped layer of plywood strips, then cover it with a smooth top layer.
A large slope may point to a foundation or structural problem. If you also see cracks in walls, sticking doors or gaps at baseboards, have a professional look at it. For cosmetic wall cracks that come with small settling, the guide on how to fix cracks in walls is a helpful follow-up once the structure is cleared.
Leveling a Concrete Subfloor
Many of the rules are the same, but the materials change. Concrete takes a grinder for high spots, a cement-based patch for low ones, and often a different primer. Moisture is a bigger concern, since concrete can wick water from the ground. Test it with a calcium chloride test or an in-situ relative humidity probe before you install anything that cannot tolerate dampness. For a full walkthrough of moisture checks and prep on slabs, see this guide to installing vinyl plank flooring over concrete.
Final Check: Underlayment and Installation Prep
Once the subfloor is flat, check it once more. Sweep the grid again with your straightedge and mark any new problem areas. Vacuum the floor. Check that the surface is clean and dry.
Then choose the right underlayment. Some floors need one, others come with a built-in pad, and some brands forbid adding a second layer. A thick or soft underlayment can also hide small flaws but can break click joints if it compresses too much. Read the installation guide for your product, and look at the options in this guide to underlayment for vinyl flooring before you buy.
Let your flooring acclimate in the room for the time the maker states. For many products this is 48 hours. Keep the room at normal living temperature. Stack boxes flat, off the floor, and do not open them early.
A Real-World Example: A 12 by 14 Foot Bedroom
Here is how the process looks on a typical job.
A homeowner removes old carpet from a bedroom with a plywood subfloor. A 10 foot straightedge shows three problems. A plywood seam near the closet stands about 1/8 inch high. A low area near the window dips 1/4 inch over about 3 square feet. The rest of the room is within 3/16 inch.
The plan is simple. The homeowner sands the seam with a belt sander and checks it twice. Then they screw down two loose spots near the window to cut a squeak. After that, they spread a feather finish in two thin coats across the low spot, feathering the edge out over 2 feet. The patch dries overnight. A final check with the straightedge shows the whole room within 1/8 inch over 6 feet. The homeowner installs vinyl plank the next day.
Total extra cost: a bag of patching compound, a bottle of primer and a few screws. Total extra time: about one day. The alternative, pouring SLU across the whole room, would have cost several times more and taken longer. Measuring first made the cheaper repair possible.
Common Mistakes to Avoid
- Skipping the measurement. A guess leads to over-pouring or missed dips.
- Leveling over a loose subfloor. Any movement will crack the compound.
- Forgetting primer. Wood absorbs water from the mix and leaves weak, dusty patches.
- Ignoring the label depth limits. Too thin or too thick both fail.
- Pouring without sealing gaps. The compound will run out and leave voids.
- Walking on the compound while it sets. Footprints stay.
- Installing flooring before the leveling layer is fully dry. Trapped moisture can ruin the new floor.
Frequently Asked Questions About Uneven Subfloor
How do I level a plywood subfloor for vinyl plank?
Start by sweeping the floor with a long straightedge and marking high and low spots. Sand down high seams and ridges. Screw down loose areas. Patch small dips with a feather finish, or pour a self-leveling underlayment made for wood if the low zone is large. Prime first, and add metal lath if the compound requires it. Check the floor again once it dries, and confirm that it meets the flatness limit in your vinyl plank instructions.
Can I use self-leveling compound on a wood subfloor?
Yes, but only with a product made for wood. Plywood moves slightly with humidity, so the compound must be flexible. Most makers want a solid, clean subfloor, a primer, and often metal lath or mesh. Follow the manufacturer’s steps exactly, since shortcuts can lead to cracks and a failed bond.
How do I fix a sloped subfloor?
First measure how much the floor drops over a set distance. If the slope is gentle and you are installing a floating floor, you may not need to correct it. For tile or hardwood, or for a steeper slope, you can pour a tapered layer of self-leveling compound, shim the joists on the low side, or add a plywood layer. If the slope is large or you see cracks and sticking doors, talk to a builder or an engineer before you cover it up.
How flat does a subfloor need to be for new flooring?
Most flooring makers ask for about 3/16 inch over 10 feet or 1/8 inch over 6 feet. Tile and some hardwood products can be stricter. Some UK products ask for around 3 mm over 2 m. These are common ranges, not rules for every product. Always read your installation guide and keep it with your receipt.
What is the cheapest way to level a floor?
Sanding high spots and patching small dips costs the least. A belt sander can often be rented for a modest daily fee, and a bag of patch compound is inexpensive. Pouring a full floor of self-leveling compound costs more, because you need primer, lath, several bags and time. Measure first. Often, a few small repairs are all you need.
How long does self-leveling underlayment take to dry?
Many products can take foot traffic after a few hours and can accept flooring after 24 hours. Thicker pours, cold rooms and humid air all slow the process. Check the label for the exact times, and test the surface for dryness before you install a new floor.
Do I need to level a floor under click-lock laminate?
Yes, in most cases. Click-lock floors rely on tight joints. When the subfloor is out of tolerance, the floor can flex and the locks can break or open. Level the subfloor to the limit in the laminate instructions.
Your Next Steps
A flat subfloor is the quiet foundation of every good floor. You do not need to be a pro to get it right. You need to measure, fix the cause, and choose the lightest repair that does the job.
Here is a simple plan for your weekend:
- Clear the room and remove old fasteners.
- Sweep a grid with a long straightedge and mark every high and low spot.
- Find your flooring brand’s flatness limit and write it on the wall.
- Fix structure first: screw down loose areas and shim gaps.
- Sand high spots, patch small dips, and pour only where you must.
- Recheck with your straightedge, then let the floor dry before you install.
If you want more clear, practical guides for your next project, visit BYB Good Idea. From flooring prep to repair and decor, we write for people who like to get things done right the first time.