
You pull back one corner of the carpet. A cloud of dust rises. Underneath, the pad is crumbling, and the floor below is stained, nailed with a hundred staples, and maybe coated in something black and sticky. This is the moment many DIY projects stall.
The good news is that carpet removal is one of the easier jobs in a house. You do not need special skills. You need a few basic tools, a clear plan, and a willingness to stop when something looks wrong.
How you remove the carpet matters more than most people expect. A careless job leaves staples in the wood, gouges in the plywood, and glue residue that will telegraph through your new floor. A careful job gives you a clean, flat surface that makes the next step easy and cheaper.
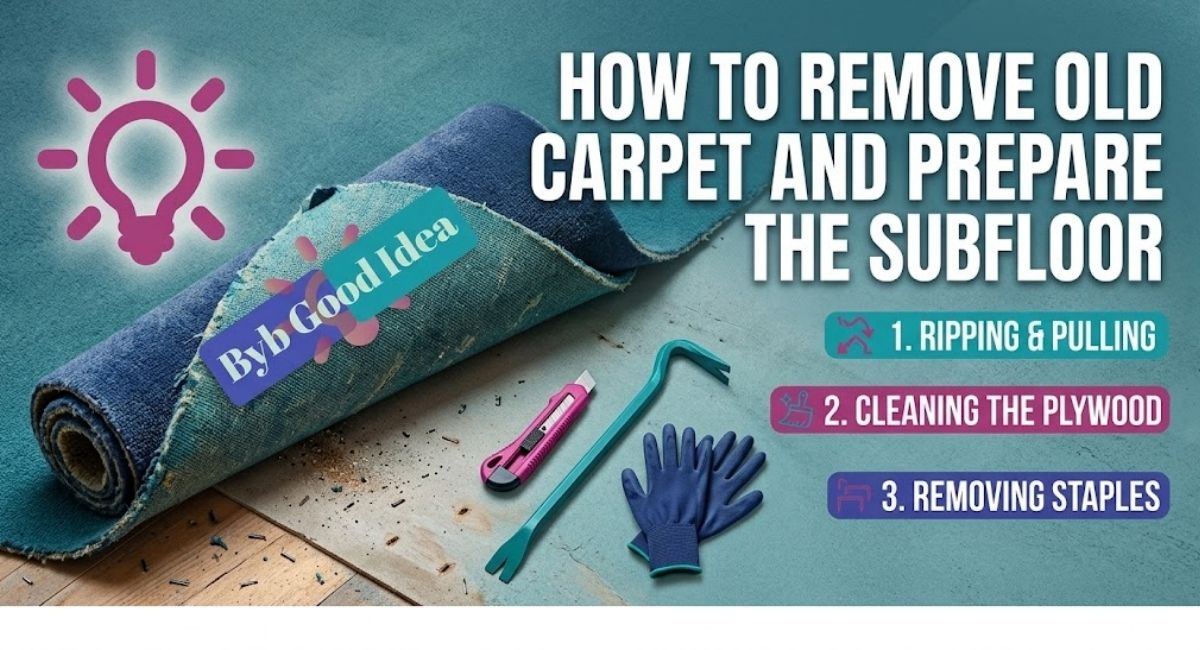
This guide covers the whole process. You will see how to test for hazards before you start, which tools to gather, how long each room takes, and how to take up carpet, pad, tack strips and staples. You will also get a subfloor inspection checklist and clear steps for repairing the surface. Whether you are in a 1960s ranch house in Ohio or a Victorian terrace in Leeds, the method is the same. Only the materials under your feet change.
Stop and Test: Is the Old Flooring Safe to Disturb?
Before you cut a single strip, check the age of the house. Older floors can hide asbestos, and you cannot see it with the naked eye.
STOP AND TEST
Do not scrape, sand, or break up any of the following until a lab has tested a sample:
1. Black or dark brown adhesive under carpet or old tile, especially in homes built before 1980. This is often called cutback adhesive.
2. Old resilient tile, usually 9 by 9 inch or 12 by 12 inch squares, found under carpet or on top of the subfloor.
3. Backing paper or felt layers that look fibrous, gray, or crumbly.
If you see any of these, leave the material in place. Do not dry sweep or vacuum it. Keep children and pets out of the room. Order a test or call a licensed asbestos professional.
Why this step matters
Asbestos was used in floor tile and in some adhesives for decades. It is only a risk when the material is damaged and the fibres become airborne. Intact tile sitting quietly under carpet is generally low risk. Scraping, grinding, and dry sanding are what release fibres.
The US Environmental Protection Agency explains that you cannot tell whether a material contains asbestos by looking at it. Only lab testing confirms it. Their asbestos guidance covers when to test, how to find an accredited lab, and when to hire a professional. In the UK, the Health and Safety Executive gives similar advice. Homes built or refurbished before 2000 can contain asbestos materials.
How to take a sample safely
If you are unsure, a lab test is cheap compared with the cost of a bad decision. Many labs charge a modest fee per sample.
- Wet the area lightly with a spray bottle so no dust rises.
- Wear a P100 respirator and disposable gloves.
- Cut a small piece, about the size of a coin, with a utility knife.
- Seal it in a labelled zip bag, then place that bag inside a second one.
- Mail it to an accredited lab and wait for the result before continuing.
If the result is positive, do not carry on as a DIY job. Licensed contractors handle removal or encapsulation, and local rules often control how the waste is bagged and disposed of. If the result is negative, you can proceed with normal care and the steps below.
Photo to add: close-up of black cutback adhesive on concrete, with a ruler for scale.
Tools and Materials for Removing Carpet and Pad
You can do this job with a short tool list. Most items cost little, and many are already in a home toolbox. Buying the right ones saves time and protects the floor underneath.
Cutting and lifting tools
A utility knife with a hooked blade is the main cutting tool. Hooked blades cut carpet backing cleanly and are safer than a straight blade because the hook guides the cut. Keep a pack of spare blades. Carpet backing dulls them fast, and a dull blade slips.
A pry bar, sometimes called a flat bar or cat’s paw, lifts tack strips. A small hammer helps drive the bar under the strip. Use a wide bar if you can. A wide bar spreads the force and reduces damage to the wood.
A staple remover pulls the staples that hold the carpet pad to the subfloor. A pair of pliers or end nippers grabs staples that snap off. A long-handled floor scraper lifts the pad when it has stuck down.
Safety and cleanup gear
Wear a respirator rated N95 or P100 when you handle old carpet and pad. Old carpet holds years of dust, pet dander, and mould spores. Add safety glasses, work gloves, and knee pads. Tack strips have rows of sharp nails, and a slip can cause a deep cut.
For cleanup, you need heavy contractor bags, duct tape, a shop vacuum with a good filter, and painter’s tape to mark cut lines. Plastic sheeting over doorways keeps dust out of the rest of the house.
Quick checklist
- Hooked utility knife and spare blades
- Pry bar and hammer
- Staple remover and pliers
- Floor scraper
- N95 or P100 respirator, glasses, gloves, knee pads
- Contractor bags, duct tape, plastic sheeting
- Shop vacuum and broom
If you plan to put down new flooring soon, make sure you also have the tools for the next job. A moisture meter, a long straightedge, a drill, and construction screws all come in handy during the subfloor stage covered later in this guide.
Room-by-Room Time and Tool Guide
Time depends on room size, how well the carpet was installed, and how many staples sit in the subfloor. The estimates below assume one person working at a steady pace with breaks. They include carpet, pad, tack strips and staples. They do not include subfloor repair or glue removal.
| Room | Typical size | Approx. time (one person) | Key tools and notes |
|---|---|---|---|
| Small bedroom | 10 x 10 ft | 3 to 4 hours | Hooked knife, pry bar, staple remover. Bag the pad in two or three rolls. |
| Large bedroom | 12 x 14 ft | 4 to 6 hours | Add a second bag of blades. Expect many staples in the pad area. |
| Living room | 14 x 18 ft | 6 to 8 hours | Plan for heavy rolls. A helper speeds up carrying. |
| Hallway and stairs | 3 x 20 ft plus 13 steps | 5 to 7 hours | Use a smaller pry bar. Stairs have tight tack strips and many staples. |
| Basement | 15 x 20 ft | 6 to 9 hours | Check for glue-down carpet and moisture. Bring a floor scraper and a meter. |
| Closet | 4 x 6 ft | 1 hour | Smaller tools work best. Watch for baseboard nails. |
These figures are approximate. A glue-down job can double the time. A job with a hard-to-lift pad can add an hour or two. Plan an extra half day if the house is older, because the subfloor often needs more attention.
Work in the right order
Begin in the room farthest from your exit. That way you do not carry rolls past freshly cleaned floors. Finish the full job in one room before moving to the next. That keeps dust and debris from spreading through the house.
Prepare the Room Before You Cut
Good prep takes about 30 minutes. It makes the rest of the job cleaner and faster.
Clear the space and protect the house
Move all furniture out. Heavy items such as sofas and bookcases go first. Take down curtains and cover vents with plastic and tape. Close the door or hang plastic sheeting over the doorway. If the room has a forced air system, turn it off while you work. Carpet dust spreads quickly through ducts.
Open a window if the weather allows. Place a box fan in the window, facing outward, to pull dust out of the room.
Remove doors, trim, and transition strips
Take the door off its hinges if it swings over the carpet. Unscrew or pry off any metal transition strips at doorways. Check the baseboards. Carpet usually tucks under or against them. You can leave them in place for most jobs, but be careful with the pry bar near the wall. If you plan to replace the baseboards anyway, remove them first with a flat bar and a thin piece of wood behind it to protect the drywall.
Mark and plan your cuts
Stand at the doorway and look at how the carpet runs. Most rooms have seams. Seams make clean cut lines. Use painter’s tape to mark a grid of strips about three feet wide. Strips of this width are easy to roll and carry. Wider strips weigh more than you expect, because the pad underneath adds to the load.
If you have a recent, clean carpet in good condition, think about whether anyone can reuse it. Small pieces make good mats for a garage or workshop. Local charities rarely accept used carpet, so do not count on donation.
How to Remove Carpet and Pad, Step by Step
Now the real work begins. Put on your respirator, glasses, gloves and knee pads. Keep a sharp blade in the knife.
Step 1: Lift a corner and pull the carpet free
Pick a corner by the door. Grip the carpet with pliers or a vise grip and pull it up from the tack strip. It should release with a firm tug. The carpet is held by the small pins on the strip, not by glue, in most homes. Pull it back about two feet to expose the pad.
If it will not lift, stop. You may have glue-down carpet. Jump ahead to the section on adhesive before you pull harder.
Step 2: Cut the carpet into strips
Fold the carpet back on itself so the backing faces up. Cut along your taped lines with the hooked knife. Cut with the blade pointing away from your legs. Do not press hard. Let the hook do the work, and make two light passes instead of one heavy one.
Work in one strip at a time. Cut, roll, and tape each roll with duct tape. A taped roll of three feet by room width is easy to carry. It also stays tight and keeps dust inside.
Step 3: Roll and bag the carpet
Roll each strip tightly with the face inward. Tape both ends and the middle. Stand the rolls near the door or carry them straight to your dumpster or garage. Do not stack them in the room. Loose rolls unravel and spill dust.
Photo to add: a strip being rolled face in, with tape bands visible.
Step 4: Pull up the carpet pad
The pad usually lifts easily. Most pads are held by a few staples around the edges, plus staples along the tack strip. Grab the pad at a corner and pull. Cut it into strips with the knife for easier handling.
Old rubber pad can be sticky, crumbly, or fused to the floor. Foam pad tends to break into pieces. Both create dust. Mist the pad lightly with a spray bottle before you lift it. That keeps most of the dust down.
A long-handled floor scraper helps with pad that has stuck. Keep the blade flat and push gently. Do not dig into the subfloor.
If you notice a strong musty smell, black spots, or damp patches on the underside of the pad, treat that as a moisture problem. Do not finish the room until you find the cause. The subfloor inspection later in this guide shows what to check.
Step 5: Bag the pad right away
Roll and bag the pad as soon as it comes up. Foam pad crumbs spread everywhere. A damp rag over a loose piece helps as well. Many councils in the UK and waste haulers in the US treat carpet as ordinary bulky waste. Check your local rules for size limits and fees before you schedule a pickup.
How to Remove Carpet Tack Strips and Staples
With the carpet and pad gone, you will see the tack strips along every wall. They are thin wood or metal strips about an inch wide, studded with angled pins. They are sharp. Treat them with respect.
Remove the tack strips safely
Many people ask how to remove carpet tack strips without ruining the floor. The trick is to lift slowly and keep the force close to the nails.
- Put on thick gloves and glasses. Pins break off and fly.
- Slide the pry bar under the strip near a nail. If you can, place a thin scrap of wood under the bar as a fulcrum. That protects the subfloor.
- Tap the bar gently with a hammer until the strip starts to lift.
- Lever the strip up and away from the wall. Work along the length, moving about six inches at a time.
- Pull any nails left in the subfloor with pliers or the claw end of the hammer.
- Drop the strips into a metal bucket or a heavy bag right away. Do not leave them on the floor.
Photo to add: pry bar under a tack strip with a wood scrap as fulcrum. Add a second photo of a lifted strip with its nails.
On concrete, tack strips are held by masonry nails. Those are harder to pull. Use a cold chisel and a small sledge to cut the nails flush if they will not come free, then check the surface for sharp stubs.
Pull staples from the subfloor
Staples are the slow part of the job. Pads are usually stapled every few inches, so a medium room can hold hundreds. Even a few missed staples can show through new vinyl or telegraph under laminate.
Use a dedicated staple remover. It has a flat tip that slides under the crown and levers the staple up. Pliers handle the ones that break. Work in rows, so you do not miss any.
A good trick is to run a magnet or a clean rag over the floor afterward. Staples catch on the cloth and show up on a magnet. Finish with a shop vacuum.
If you are asking how to remove carpet staples quickly, a long-handled stapler puller or a flat scraper can speed things up on open floor. A scraper is fine on plywood but can gouge softer OSB, so use light pressure.
Check the edges and corners
Corners hide the most missed fasteners. Check along walls, under door frames, and around heating vents. Run your hand along the surface in gloves and feel for anything that snags. Mark any hidden spots with tape and come back with the pliers.
Glue-Down Carpet and Adhesive on Concrete
If the carpet will not lift from the edge, it was probably glued. This is common in basements, garages, offices, and some apartments. The steps differ, and so do the risks.
Test first, then remove
Return to the safety box earlier in this guide. If the adhesive is black, brown, or very old, test it before you scrape. If the lab result is negative, you can work with normal dust control. If it is positive, stop and hire a professional.
Remove glue-down carpet
Cut the carpet into strips as before. Pull each strip back at a low angle, so the backing separates from the glue. Some carpet leaves its backing behind, which is called delamination. Scrape the remaining backing off with a long-handled floor scraper.
Work in small areas of two or three square feet. Keep the scraper blade sharp. A dull blade skates and leaves ridges. Spray the area lightly with water to control dust.
How to remove carpet glue from concrete
Once the backing is gone, you will see a layer of adhesive on the slab. A modern water-based carpet glue is often tan or yellow and scrapes off in sheets. Old black cutback adhesive is stickier and harder, and it is the type linked to older asbestos-containing products.
For tested, non-asbestos adhesive, you have four main options.
- Scraping. A heavy floor scraper works well on brittle, dry glue.
- Warm water and detergent. Water-based glue softens with a wet mop and a scrub pad.
- Citrus or soy-based adhesive remover. These work slowly and have lower odour. Follow the label.
- Rental floor grinder. For large areas, a diamond cup grinder with a dust shroud and HEPA vacuum removes residue fast. Use it only on tested, non-asbestos glue.
A dedicated floor stripper can also help with stubborn residue on sealed floors. Always test a small spot first.
Do not use gasoline, paint thinner, or other flammable solvents. They create fire hazards, they leave residue that hurts new adhesive, and they can seep into the slab.
After removing residue, check how flat and dry the concrete is. If you plan to lay vinyl or laminate on top, a smooth, clean concrete floor is easier to prepare than you might expect. A thin layer of leftover adhesive is usually acceptable if the new flooring system allows it. Check the manufacturer’s instructions.
Photo to add: a floor scraper lifting backing from a tested, non-asbestos adhesive layer.
Subfloor Inspection Checklist
Once the carpet, pad, strips and staples are gone, take a slow walk across the bare floor. Bring a flashlight, a long straightedge, a screwdriver, and a moisture meter if you own one. Kneel and look at the surface at a low angle. Shadows reveal dips and ridges that are hard to see standing up.
Use the table below as your checklist. Work through it room by room.
| Check | What to look for | What to do |
|---|---|---|
| Fasteners | Loose nails, missed staples, raised screw heads | Pull staples and nails. Drive loose screws flush. |
| Squeaks and movement | Boards that flex or creak underfoot | Add construction screws into the joists every 6 to 8 inches. |
| Water stains | Dark rings, grey patches, mould, a musty smell | Find the leak. Dry the area. Replace damaged panels. |
| Soft spots | Wood that dents under a screwdriver | Cut out and replace the section. |
| Gaps and seams | Open joints between panels, large cracks | Fill with patching compound or wood filler. |
| Flatness | Dips or humps more than 3/16 inch over 10 feet | Sand high spots. Fill low spots with a levelling compound. |
| Surface | Old adhesive, paint, grease, wax | Scrape and clean until the surface is bare and dry. |
| Concrete cracks | Hairline or wide cracks, spalling | Patch hairline cracks. Repair wide cracks with epoxy or a repair mortar. |
| Moisture | Damp concrete or wood above manufacturer limits | Wait, fix the source, or use a moisture barrier as the flooring maker advises. |
Photo to add: a straightedge laid across a plywood subfloor with a light under it to show a dip.
What the results tell you
A few loose nails or a small gap are minor jobs. A wide soft area, a long water stain, or movement across a whole room are bigger problems. They often point to a leak, a failed seal, or a weak joist. Do not lay new flooring over a structural problem. Check your joist spacing and span against local codes. A floor joist span table gives a quick reference for typical sizes and lengths.
If you hear squeaks when you step on bare plywood, fix them now. After new flooring goes down, you cannot reach the problem. Our guide on how to fix squeaky wood floors walks through the screw technique in detail.
How to Prepare the Subfloor After Removing Carpet
A clean subfloor is not the same as a ready subfloor. Prep is where most flooring failures are prevented. Spend the time here and the new floor will last longer and look better.
Plywood subfloor
Plywood is strong and stable. It is common in homes built since the 1950s. Check for delamination, which shows as peeling layers at the edges. Check also for rot near plumbing and exterior doors.
Sink every loose nail or screw. Replace any damaged sheet. Cut the bad section back to the nearest joist so the new piece has solid support. Fill gaps wider than 1/8 inch with a patching compound. Sand ridges at the seams. Vacuum thoroughly when you finish.
OSB subfloor
Oriented strand board, or OSB, is cheaper than plywood and common in newer builds. It handles dry conditions well but swells when it gets wet, and swollen edges telegraph through thin flooring. Sand raised edges flat. If the OSB has soaked up water and does not dry back to its original thickness, replace it.
Do not scrape OSB hard. The surface strands lift easily. Use a sanding block or a light pass with a random-orbit sander instead.
Concrete slabs
Sweep and vacuum the slab. Remove paint, grease, and any adhesive that the next flooring cannot sit over. Patch hairline cracks with a flexible filler. Grind high spots and fill low spots. Test for moisture before you install anything. A simple plastic sheet test, taped down for 24 hours, shows condensation if moisture is rising. A calcium chloride or relative humidity test gives a more reliable number, and most flooring makers specify the test they want.
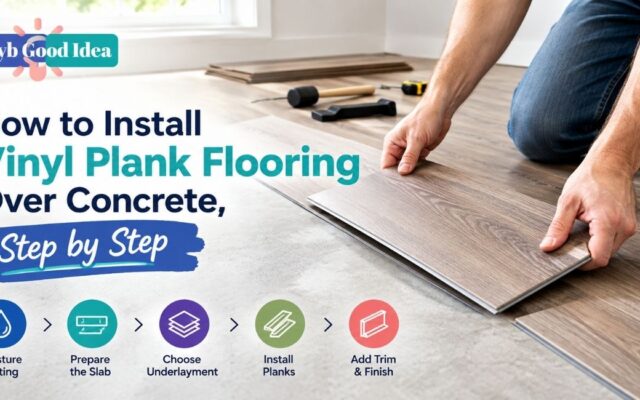
If you plan to lay vinyl plank over the slab, follow a proper method for installing vinyl plank flooring over concrete. Basements often need extra attention, because slabs there can hold moisture all year.
Level and clean the surface
Levelling compound fixes shallow dips. Mix it according to the label and pour it into the low spots. Spread it with a trowel. Let it cure for the full time stated. Skip the cure, and you risk cracks and a weak bond.
Finish by sweeping, vacuuming with a HEPA filter, and wiping with a damp cloth. Dust left behind weakens adhesive and gets trapped under floating floors.
Choose the right underlayment
Some floors need an underlayment, some do not. Floating laminate and engineered boards usually need a foam or cork layer. Vinyl plank may need a specific pad, and adding the wrong one can void a warranty. Read the product instructions, then check this guide to underlayment for vinyl flooring if you are choosing between options.
Common Mistakes, Disposal, and Protecting the Subfloor
Can you remove carpet without damaging the subfloor?
Yes, in most cases. Light damage is normal. Staple holes and small scrapes do not matter, because new flooring covers them. Deep gouges, torn plywood faces, and bent panels do matter.
Three habits protect the surface. First, cut the carpet into strips so you never drag heavy rolls across the floor. Second, use a wide pry bar with a wood scrap under it. Third, keep tools flat and never twist a bar against the wood. If a staple will not come out, cut it flush with end nippers instead of tearing the wood around it.
Mistakes to avoid
Some errors show up again and again on DIY carpet jobs.
People skip the asbestos question on older homes. They rush the staples and leave dozens behind. They forget to check for moisture before they cover the floor. They scrape glue with a dull blade and carve the slab. They also wear a thin dust mask instead of a real respirator. Each of these costs far more to fix later than it costs to prevent now.
Another common mistake is delaying new flooring for weeks after the prep is done. Bare subfloors collect dust, take on humidity, and get scuffed by foot traffic. Aim to install within a few days, and cover the floor with clean paper or plastic if you must wait.
Disposal and cleanup
Rolled carpet and pad are heavy, so plan the haul before you start. Options include a rented dumpster, a bulky waste collection from the local council or hauler, or a trip to a transfer station. Fees vary. Ask about size limits and whether they require bagging.
Bag nails, staples, and tack strips separately in a sturdy container. Tape the top and label it. Sharp scrap can injure waste workers. Bag any suspected asbestos material only under the rules set by your local authority, and never put it in household bins.
Finish by vacuuming the room twice with a HEPA vacuum. Wipe the walls and trim. Wash your work clothes separately and take a shower before you sit down.
Quick Answers to Common Carpet Removal Questions
Can I remove old carpet myself?
Yes. Removing old carpet yourself is a manageable weekend job for most rooms. You need basic tools, a respirator, and patience. The exceptions are houses with suspected asbestos materials and large basements with glue-down carpet. In those cases, test first and call a professional if the result is positive.
Do I have to remove the tack strips?
It depends on your next floor. If you are laying new carpet, you can reuse good tack strips, though most installers replace them. For hardwood, laminate, vinyl, or tile, remove them. Strips left in place create bumps and can damage floating floors.
What is the fastest way to pull carpet staples?
A dedicated staple remover is the fastest tool for most people. Work in rows and clear each row before the next. Pliers handle broken staples. A magnet or a clean rag run over the floor shows what you missed.
Is black adhesive under carpet always asbestos?
No. Black adhesive is a warning sign, but it is not proof. Many cutback adhesives made before the 1980s contained asbestos, and some did not. Only a lab test can tell you. Until you have a result, leave the adhesive alone and keep dust to a minimum.
Can I lay new flooring directly over a plywood subfloor?
Often yes, after prep. The plywood must be flat, dry, firmly fastened, and free of old adhesive, staples, and damage. Many flooring makers require a specific underlayment. Read the installation guide for your product so the warranty stays valid.
How much does carpet removal cost if I hire a professional?
Prices vary by region, room size, and condition. Many contractors charge by the square foot, and the bill rises when glue, stairs, or heavy disposal are involved. Ask for a written quote that lists carpet, pad, strips, staples, and disposal as separate items. Compare at least two quotes before you hire.
Your Next Moves After the Carpet Is Gone
Removing old carpet is simple work, but it rewards care. Test older floors before you disturb them. Cut carpet into strips, lift the pad, and pull the tack strips with a wood scrap under the bar. Take out every staple. Then inspect the subfloor, repair what is weak, level what is uneven, and clean it until it is dry and dust free.
Here is a short action plan.
- Check the age of the house and test any black adhesive or old tile.
- Gather tools and a respirator, then clear the room.
- Remove carpet, pad, tack strips, and staples, in that order.
- Run through the inspection checklist and fix problems.
- Install your new floor within a few days.
If you want more guidance on what to lay next, the team at BYB Good Idea has practical guides for every stage of a flooring project. Start with the one that matches your subfloor, and bring a tape measure to the store.
Have a carpet removal story or a question about your own subfloor? Visit BYB Good Idea for more step-by-step home improvement guides, and share your project with us.