
You picked the floor. You love the color. The boxes are stacked in the garage. Then you open the installation sheet and see three words you did not expect: floating, glued, or nailed. Now you have to choose a method, and the wrong one can cost you a warranty, a weekend, or a whole floor.
Here is the good news. Most of the choice is made for you by what sits under the flooring. A concrete slab, a plywood subfloor and a radiant heat system each point to different methods. Once you know your subfloor, the shortlist drops from three options to one or two.
This guide starts with a subfloor-first decision chart so you can pick a method fast. Then it goes deeper into how each method works, how it sounds underfoot, how easy it is to repair, and how buyers see it at resale. Along the way, it uses terms you will see on product sheets: click-lock, trowel notch size, flooring nailer, cleat, and moisture content. If you are still deciding on the floor itself, the laminate vs vinyl vs LVP comparison is a useful place to start.
The 30-Second Decision Chart: Start With Your Subfloor
Your subfloor is the surface under your new floor. It limits what you can do. Use this chart first. Then read the sections below to confirm your pick.
| Your subfloor | Best methods | Methods to avoid or check first | Quick reason |
| Concrete slab (on or below grade) | Glue-down or floating | Nail-down (not possible without a wood layer on top) | You cannot nail into concrete reliably. Glue-down bonds well. Floating works with a moisture barrier. |
| Plywood or OSB subfloor over joists | Nail-down, floating or glue-down | None, but check the panel thickness and flatness | Wood subfloors accept all three methods, depending on the flooring type. |
| Radiant heat in a slab | Floating or glue-down | Nail-down (rarely allowed) | Nails can damage tubing, and most makers restrict it. Check heat limits. |
| Radiant heat in a wood subfloor | Floating or glue-down, sometimes nail-down with special design | Nail-down unless the maker allows it | Tubing sits close to the surface. Many brands ban fasteners. |
| Old vinyl, tile or other hard floor | Floating, or glue-down after prep | Nail-down over thick or loose layers | Floating hides minor flaws and avoids heavy prep, but flatness still matters. |
| Basement slab with moisture concerns | Floating (rigid core vinyl) or glue-down with a moisture mitigation system | Solid hardwood of any method | Dampness is the main risk. Test first. |
How to use this chart. Find your row. Read the “best methods” column. Then check your flooring maker’s installation sheet. That sheet is the final word. If your floor is not approved for the method you picked, do not use it. A warranty claim can be denied if you ignore the instructions.
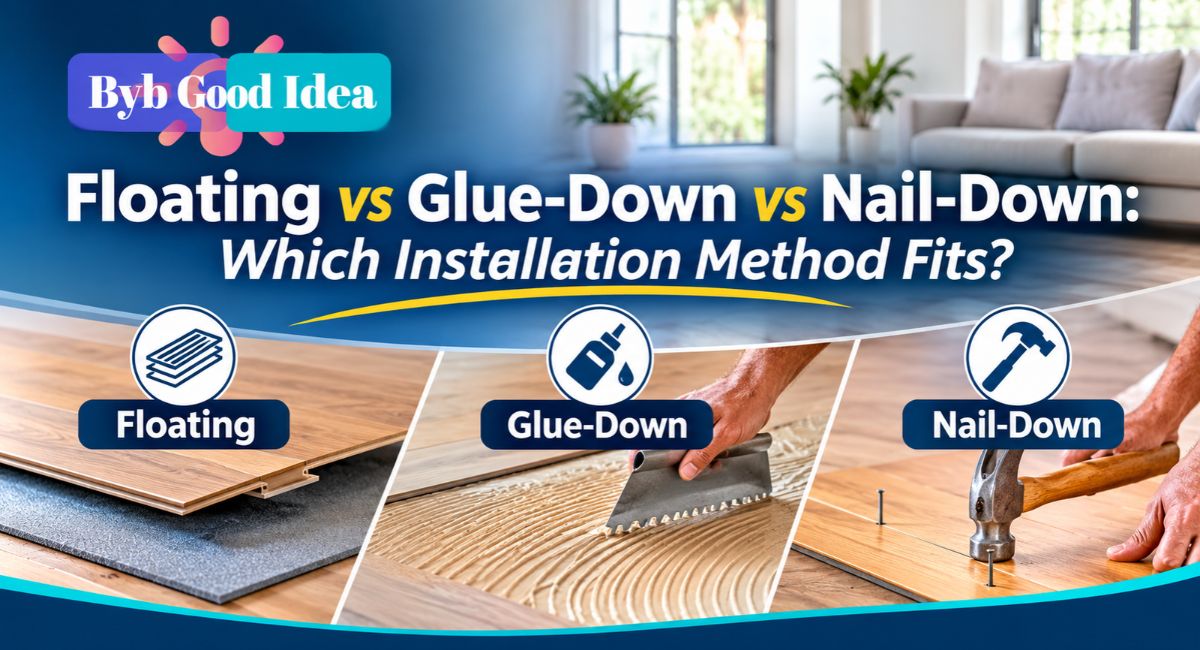
What Do “Floating,” “Glue-Down” and “Nail-Down” Actually Mean?
These three terms describe how the flooring connects to the subfloor. They do not describe the floor material. The same species of wood, or the same vinyl plank, may be offered in more than one method. But each product has limits.
Floating floors
A floating floor is not fixed to the subfloor. The planks connect to each other instead. The most common system is click-lock, where the edges have a tongue and groove profile that snaps together. Some floating floors use glued tongue-and-groove joints. Others use a locking profile that needs no glue.
The whole floor sits on top of the subfloor, often over a thin underlayment pad. It can expand and contract slightly as one piece. Because of this, you must leave an expansion gap around the edges. The gap size is on the maker’s sheet. It often ranges from about 1/4 inch to 3/4 inch, depending on the product and room size.
Floating installation is common for laminate, luxury vinyl plank, and many engineered hardwood floors.
Glue-down floors
A glue-down floor is bonded to the subfloor with adhesive. You spread the glue with a notched trowel. The notch size and shape matter. The adhesive maker and the flooring maker both specify it. If you use the wrong trowel, you will put down too little or too much glue. Too little glue leads to hollow spots and loose planks. Too much glue can ooze between boards.
Glue-down works for engineered hardwood, some solid hardwood in narrow widths, luxury vinyl tile, sheet vinyl, and some bamboo products. Many adhesives are urethane-based. Some double as a moisture barrier. Others are not. Again, the label tells you.
Nail-down floors
Nail-down, also called staple-down, means you fasten each board to a wood subfloor. You use a flooring nailer, which drives a cleat or staple through the tongue of each board at an angle. A cleat is a barbed, L-shaped fastener made for flooring. Staples are also common, and some products require one or the other.
Nail-down is the traditional method for 3/4 inch solid hardwood. Some thicker engineered boards also allow it. It needs a wood subfloor, usually plywood or OSB at least 5/8 inch thick, and often 3/4 inch. A concrete slab cannot take nails directly. Builders sometimes add a plywood layer over the slab, but this adds height and cost and comes with its own moisture rules.
Floating Floors: How They Work and Where They Shine
Floating floors are the most DIY-friendly of the three. You need a saw, a tapping block, spacers and patience. There is no glue to spread and no nailer to rent.
Where floating floors fit best
- Concrete slabs, with a proper vapor barrier or an underlayment that has one.
- Wood subfloors where you do not want to fasten into joists.
- Over existing hard floors, if they are flat, clean and well bonded.
- Rooms where you may want to change the floor again within 10 to 15 years.
Pros of floating floors
Fast installation. A skilled DIYer can lay a bedroom in one day. There is no cure time and no wait before walking.
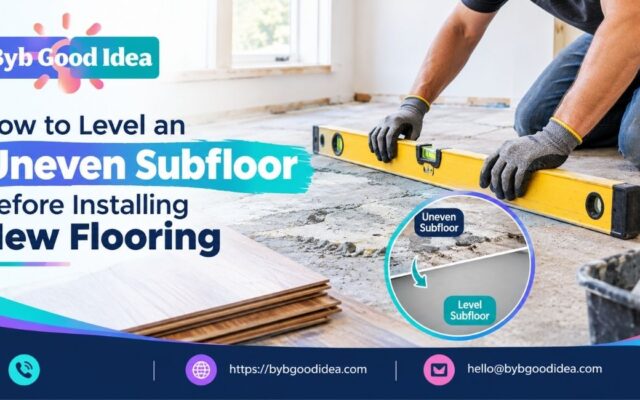
Forgiving over minor flaws. The underlayment smooths very small bumps. It does not fix real dips or ridges, though. A floating floor still needs to meet the flatness limit on the product sheet. If your subfloor is wavy, the guide on how to level an uneven subfloor should come first. The usual limit is about 3/16 inch over 10 feet, or 1/8 inch over 6 feet, but your maker may differ.
Easy to repair. With click-lock planks, you can often unlock a row back to the damaged plank, swap it, and relock the row. This takes time but no special tools.
Works with radiant heat. Most floating floors are approved for radiant systems, provided you use the right underlayment and keep the surface temperature within the maker’s limit.
Cons of floating floors
Hollow sound. Because the floor is not bonded, it can sound drummy when you walk on it. A good underlayment reduces the noise. Even so, it will rarely match the solid feel of a glued or nailed floor. If sound control matters in a room, see the tips in this guide on soundproofing a home office.
Movement. The floor expands and contracts across the whole room. Large open areas need transition strips or expansion breaks. Wide runs can also pinch at doorways or heavy furniture, so follow the maximum run lengths in the instructions.
Perceived value. Some buyers see floating floors as a lower-tier option, even when the planks are high quality. This depends on the product and the market.
Click-lock limits. Cheap click systems can fail if the subfloor is not flat. Edges can chip or open over time.
Underlayment for floating floors
Most floating floors need an underlayment unless the planks have a pad attached. The right pad can add sound reduction, a moisture barrier, and a bit of cushion. The wrong pad can void the warranty. Thick or soft foam can make click joints flex and break. The guide on underlayment for vinyl flooring covers the basics of choosing one. Always check the maker’s sheet for approved types and thickness.
Glue-Down Floors: Solid Feel, Strict Prep
Glue-down floors feel the most solid. They are quiet, stable and less prone to movement. They are also the least forgiving to install.
Where glue-down floors fit best
- Concrete slabs, where nailing is not possible.
- Radiant heat systems, since the bond transfers heat well and there are no fasteners to hit tubing.
- Commercial or high-traffic rooms where stability matters.
- Wide-plank engineered floors that benefit from full contact with the subfloor.
How glue-down installation works
The steps look simple, but the details matter.
- Test the slab for moisture. Concrete releases water vapor for years. Two common tests are the calcium chloride test, which measures moisture emission rate, and the in-situ relative humidity probe test. The flooring and adhesive makers list the limits they accept. Skipping this step is the most common cause of glue-down failures.
- Prepare the surface. The slab must be clean, flat and free of curing compounds, sealers, paint and old adhesive. Grind high spots and fill low spots with a patching compound.
- Pick the right adhesive. Use only the adhesive the flooring maker approves. Some adhesives include a moisture barrier. Others do not.
- Use the right trowel notch size. The notch size controls how much adhesive stays on the floor. A smaller notch leaves less glue, a larger one leaves more. The adhesive label lists a size, and the flooring maker may specify another. Follow both. Replace trowels when the teeth wear down.
- Work in sections. Spread glue only as far as you can cover before it skins over. The open time is on the label.
- Roll the floor. After placing the boards, use a heavy floor roller to press them into the adhesive. This bonds the planks and removes air pockets.
- Wipe off excess adhesive right away. Dried urethane adhesive is very hard to remove from the face of a plank.
For concrete installs of vinyl planks, the walkthrough on installing vinyl plank flooring over concrete shows how moisture and prep steps work in practice.
Pros of glue-down floors
Quiet and solid. There is no hollow sound. The floor feels like part of the house.
Stable. Planks cannot shift, so gaps are less likely. Bonded floors also resist seasonal movement better.
Good on concrete and over radiant heat. The bond helps heat move up into the room.
Strong resale appeal for engineered hardwood. Buyers often see glue-down engineered wood as a quality install.
Cons of glue-down floors
Messy and slow. You will deal with adhesive, odor, and cure times. Most makers want you to keep traffic off the floor for 24 hours or longer.
Hard to repair. To replace a plank, you must cut it out and chip away the bonded piece. Then you glue in a new one. It is possible, but not easy.
Hard to remove later. Tearing out a glued floor can damage the slab. Expect scraping, grinding and a lot of dust. Take care with any old adhesive if the house is older. Black mastic from before the 1980s in the USA, or before 2000 in the UK, can contain asbestos. Test before you scrape.
Moisture sensitive. If the slab is too damp, the floor can fail. The glue can break down, planks can cup, and mold can grow beneath.
Adhesive cost. A pail of flooring adhesive adds a noticeable amount to the materials budget.
Nail-Down Floors: The Classic Choice for Solid Hardwood
If you picked 3/4 inch solid oak or maple, you are probably on the nail-down path. This method has been used for generations.
Where nail-down floors fit best
- Wood subfloors, such as plywood or OSB over joists.
- Main floors and upper floors where the subfloor is solid and flat.
- Homes where you want a floor that can be sanded and refinished several times.
How nail-down installation works
Most nail-down jobs follow a pattern.
- Check the subfloor. The wood must be clean, dry and flat. The National Wood Flooring Association (NWFA) sets the guidelines that most U.S. hardwood makers follow. Their rule for flatness is about 3/16 inch over 10 feet, or 1/8 inch over 6 feet. They also advise that the subfloor moisture content be within a few points of the flooring. You can read their installation guidelines on the NWFA website.
- Lay a vapor retarder. On wood subfloors above a crawlspace, builders often add asphalt-saturated felt or a similar sheet to slow moisture and reduce squeaks.
- Plan the layout. Mark the joist lines. Pick the direction. Most installers run boards across joists, at a right angle.
- Start with a straight row. The first and last rows are face-nailed, since there is no room for the nailer.
- Use a flooring nailer. A pneumatic flooring nailer drives a cleat or staple through the tongue. The nailer matches a specific board thickness. Use the right model and the right length of fastener.
- Stagger the end joints. Offset seams by at least 6 inches, so the pattern does not line up.
- Leave an expansion gap at walls. The baseboard or trim covers it.
Hardwood needs time to acclimate before install. The wood must adjust to the home’s humidity. Many makers want boxes to sit in the room for several days. Check your sheet.
Pros of nail-down floors
Strong and proven. The bond between board and subfloor is mechanical, and it lasts for decades.
Refinishable. Solid 3/4 inch wood can be sanded several times, which extends its life well beyond 50 years.
Highest resale appeal. Buyers and agents often see site-finished or nail-down solid hardwood as the gold standard. The look and the feel are hard to match.
No adhesive fumes.
Cons of nail-down floors
Needs a wood subfloor. You cannot nail into concrete without adding a plywood layer.
Not suited for radiant heat in most cases. Fasteners can hit tubing, and the heat can dry out and shrink the wood. Some makers approve certain engineered products for nail-down over radiant systems with sleepers, but most do not.
Squeaks can happen. If the subfloor is loose, or if joists move, you can get noise. Fixing it later is a chore. The guide to fixing squeaky wood floors shows what to do from above and below.
Higher labor cost. Solid hardwood costs more to buy and to install. The numbers vary by region and species. A look at the cost to install hardwood flooring can help you plan.
Tool rental. You need a flooring nailer, an air compressor, and a mallet.
How Each Method Compares: Noise, Repairs, Resale and Cost
Now that you know the basics, here is a side-by-side look. The ratings below are general. Specific products and installers can shift the results.
| Factor | Floating | Glue-down | Nail-down |
| Subfloor needed | Concrete, wood or existing floor | Concrete or wood | Wood only |
| Sound underfoot | Can sound hollow, improves with good underlayment | Quiet and solid | Solid, but squeaks if the subfloor moves |
| Repairability | Easy for click-lock, replace a row or a plank | Hard, plank must be cut out and glued | Moderate, boards can be pulled and replaced, solid wood can be refinished |
| Radiant heat | Usually approved, with limits | Usually approved, often the best fit | Rarely approved |
| Moisture tolerance | Good with a barrier and a rigid core | Needs a tested slab and the right adhesive | Needs a dry wood subfloor |
| DIY difficulty | Easiest | Hardest to do cleanly | Moderate, needs special tools |
| Install speed | Fastest | Slowest, with cure time | Moderate |
| Resale impression | Fair to good, depends on product | Good, especially engineered wood | Excellent for solid hardwood |
| Removal later | Easy | Hard and messy | Moderate |
Use the table as a guide, not a rule. A well-installed floating floor can beat a poorly done glue-down.
Noise: Which Method Sounds Best?
Noise is the factor people mention most after a floor goes in. It comes in two types. Airborne sound is what you hear in the room, like voices or a TV. Impact sound is what you hear below, like footsteps through the ceiling.
Glue-down floors are the quietest in both cases. The bond leaves no gap for sound to echo. Nail-down floors are solid underfoot and can be very quiet, but they may squeak if boards move on the subfloor. Floating floors can produce a hollow click or tap sound. A dense, well-chosen underlayment helps a lot.
If you live in an apartment or condo, check your building rules. Many require a minimum sound rating, measured as IIC (impact insulation class) or STC (sound transmission class). Not every method and underlayment combination meets these rules. Ask the building manager before you buy.
Repairability: What Happens When a Plank Is Damaged?
Dropped pans, pet accidents and water leaks happen. How hard is the fix?
With a floating click-lock floor, you can often lift the planks from the nearest wall to the damage. Then you swap the bad plank and click the row back together. It takes patience, but you do not need to cut into the floor. Keep a few spare planks from the same batch, since colors can vary between production runs.
With a glue-down floor, repair means cutting out the damaged plank, scraping up adhesive, and gluing in a new plank. It is a precise job, and many owners hire a pro. Again, spare planks are a smart idea.
With a nail-down solid hardwood floor, a damaged board can be cut out and replaced. Deep scratches and wear can be sanded away and refinished. This is one reason solid hardwood holds value so well.
Resale: What Do Buyers Notice?
Buyers do not usually ask how a floor was installed. They notice how it looks, how it feels, and what it is made of. Real hardwood still tends to sit at the top of the list in many markets. Engineered hardwood, installed well, is also well regarded. High quality luxury vinyl plank is popular and practical, and many buyers value its water resistance.
The install method matters at the margins. A floor that feels solid and quiet makes a stronger impression during a showing. A floor that sounds hollow or shows gaps can lower that impression. Agents and inspectors may also flag moisture problems, cupping or loose planks.
If you plan to sell within a few years, pick a floor that fits the style of the home and the price range of the neighborhood. A mid-range home often does well with high quality LVP or engineered wood. A higher-end home may call for solid hardwood.
What About Radiant Heat?
Radiant floor heating warms the room from below. It uses hot water tubes or electric mats in or under the floor. It is comfortable and efficient, but it limits your flooring choices. If you are considering it, the guide on radiant floor heating and whether it is worth it explains the basics.
For flooring over radiant heat, the key points are:
- Check the maker’s approval. Not every floor is approved. Many sheets list a maximum surface temperature, often around 80 to 85 degrees Fahrenheit (about 27 to 29 degrees Celsius).
- Ramp the heat slowly. Many makers want you to change the temperature by a few degrees a day. Rapid changes can cause gaps or cracks.
- Keep the floor’s thermal resistance low. Thick underlayments and wide planks can block heat. Look at the R-value listed in the instructions.
- Avoid fasteners. Nails and staples can hit tubing. Floating and glue-down are the safer routes.
- Prefer stable products. Engineered hardwood, rigid core vinyl and some laminates handle temperature swings better than solid wood.
Real-World Scenarios
Scenario 1: A basement slab in a 1990s home
A homeowner wants to finish a basement. The slab tests at a moderate moisture level. Solid hardwood is out, since it will not tolerate the dampness. A rigid core luxury vinyl plank with an attached pad and a floating install is a good fit. It resists moisture, goes in quickly and can be replaced later. For more ideas on damp spaces, see this look at basement flooring that holds up.
Scenario 2: A plywood subfloor in a two-story house
A family wants real hardwood in the living room. The subfloor is 3/4 inch plywood over joists, dry and flat. Solid oak with a nail-down method is the natural pick. The family can refinish the floor in 20 years. It will add resale value and feel solid underfoot.
Scenario 3: A condo with a slab and radiant heat
A condo owner has a concrete slab with a hydronic radiant system. Nailing is not allowed. A wide plank engineered floor, glued down, offers a stable base and good heat transfer. The owner checks the maker’s sheet for temperature limits and ramps the heat slowly after install.
Common Mistakes People Make
- Ignoring the maker’s installation sheet. It names the approved methods, adhesives, underlayments and subfloor limits. A mistake here can void the warranty.
- Skipping the moisture test. This is the top cause of glue-down and floating failures over concrete.
- Using the wrong trowel notch. Too little glue leads to loose planks. Too much leads to ooze and a messy install.
- Forgetting expansion gaps. Floors need room to move. A tight floor can buckle.
- Installing over a wavy subfloor. Flatness limits matter for all three methods.
- Choosing a method for speed alone. A fast floor that fails costs more than a slow one that lasts.
How to Choose in Four Steps
- Identify your subfloor. Concrete, plywood, OSB, or an existing floor. Check for radiant heat.
- Test it. Measure moisture and flatness. If the numbers fail, fix the subfloor first.
- Read the installation sheet. List the methods your floor allows. Cross off any that do not match your subfloor.
- Weigh your priorities. Noise, repairs, resale and budget. Pick the method that fits the most of them.
Frequently Asked Questions
Which flooring installation method is best?
There is no single best method. The best choice depends on your subfloor and your flooring type. Nail-down suits solid hardwood on wood subfloors. Glue-down suits concrete and radiant heat. Floating suits DIY installs, damp spaces and quick projects. Check the maker’s sheet to see which methods your product allows.
Is floating or glue-down better on concrete?
Both work. Floating is faster, easier and simpler to repair, but it can sound hollow and needs a moisture barrier. Glue-down feels more solid and works well with radiant heat, but it demands careful prep and a moisture test. Pick floating for speed and flexibility. Pick glue-down for a solid feel and a long-term install.
Can I nail down hardwood on a plywood subfloor?
Yes. A plywood subfloor is the standard base for nail-down hardwood. The plywood should be clean, dry, flat and securely fastened. Most makers call for panels at least 5/8 inch thick, and many prefer 3/4 inch. Use a flooring nailer, and follow the board spacing and expansion gap on the sheet.
Is a floating floor worse than a nail-down floor?
Not always. A floating floor can look great and perform well for many years. It is often cheaper and faster to install. A nail-down solid floor can be refinished more times and may add more resale value. Floating floors can sound hollow, and some buyers see them as lower-tier. The right choice depends on your priorities and budget.
What are the pros and cons of floating floors?
The pros are easy installation, lower labor cost, easy plank repair and good moisture options with rigid core products. The cons are a possible hollow sound, movement across large rooms, and a lower perceived value for some buyers. Choose good underlayment and follow the expansion rules to get the best result.
Can I use any method over radiant heat?
No. Most makers approve floating and glue-down over radiant heat, with temperature limits. Nail-down is rarely approved, since fasteners can hit tubing. Always check the instructions for your flooring and your heating system.
Do I need to acclimate the flooring?
Yes, in most cases. Wood and some engineered products need time in the room to match the home’s humidity. Vinyl and laminate also benefit from rest time. The sheet lists the time and the conditions. Many call for 48 hours or more.
Your Next Move
Choosing between floating, glue-down and nail-down is easier when you start with the subfloor. Concrete points toward glue-down or floating. Wood opens up all three. Radiant heat narrows the field to floating or glue-down. From there, noise, repair and resale help you break any tie.
Before you buy, do three things:
- Test your subfloor for moisture and flatness.
- Read the installation sheet from the flooring maker.
- Pick the method that fits your subfloor, your room and your budget.
For more practical flooring guides, project ideas and repair tips, keep reading at BYB Good Idea. We aim to help you make sound choices before the first plank goes down.