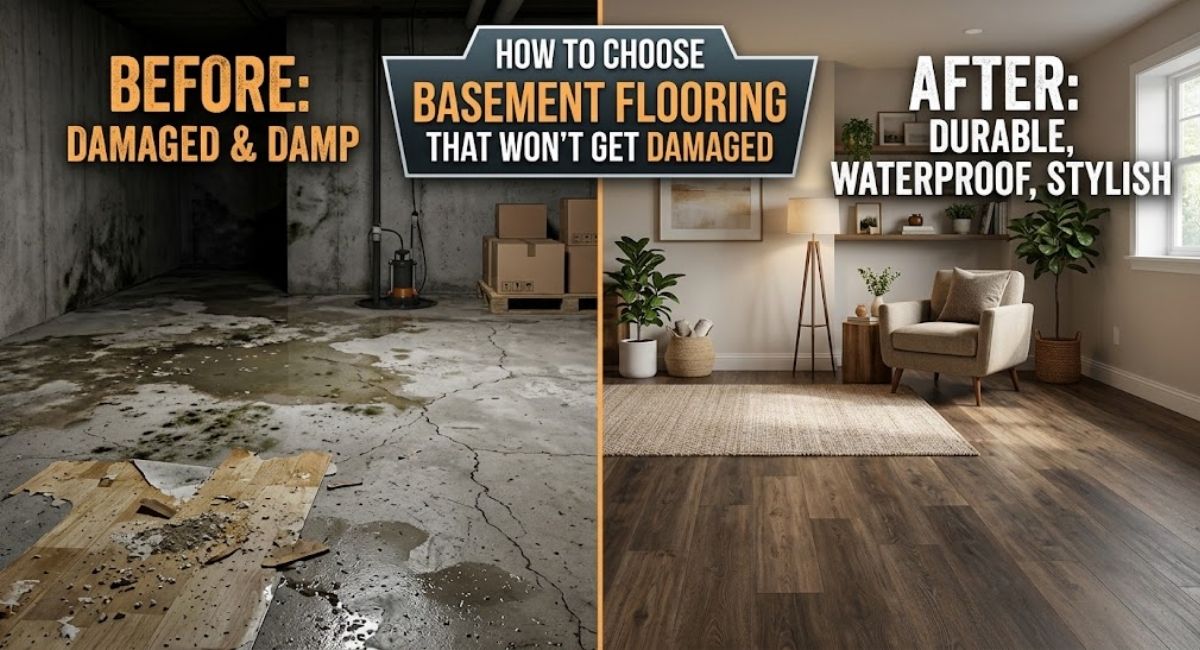

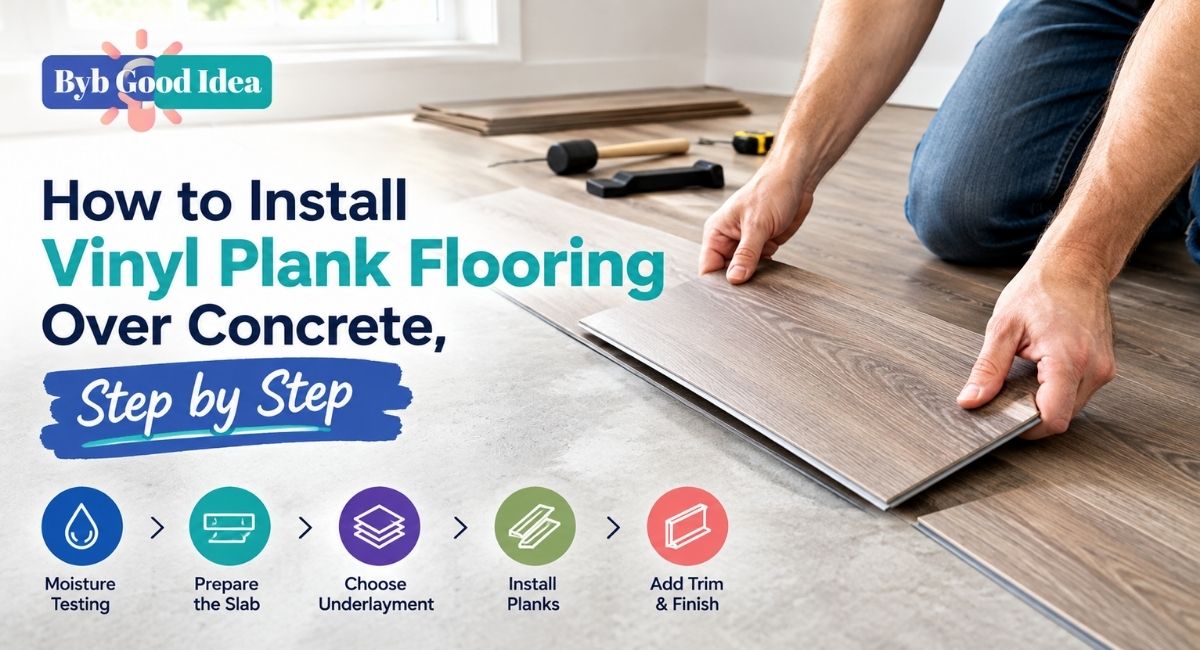
Vinyl plank flooring can give a concrete floor the look of natural wood without the maintenance that real wood often requires. It works well in many living rooms, bedrooms, kitchens, and finished basements. It is also a popular choice for renovations because many luxury vinyl plank products use a click-lock system that does not require glue.
However, a successful installation depends on more than choosing attractive planks and snapping them together. Concrete can hold moisture even when its surface looks completely dry. Small dips can cause joints to separate. Dust, old adhesive, and uneven areas can also affect how the finished floor performs.
The most important step happens before you install the first plank. Test the concrete for moisture and check the manufacturer’s installation requirements. These checks help you avoid problems that may not appear until weeks or months after installation.
This guide explains how to install vinyl plank flooring over concrete, from moisture testing and surface preparation to laying the first row, cutting planks, and finishing the edges. It also covers underlayment, moisture barriers, common mistakes, and the situations where professional help may be the better option.
Can You Put Vinyl Plank Flooring Over Concrete?
Yes. You can install vinyl plank flooring over a suitable concrete slab if the surface meets the flooring manufacturer’s requirements for moisture, flatness, cleanliness, and structural condition.
Concrete is a common subfloor for luxury vinyl plank (LVP) flooring. It provides a firm base and does not flex in the same way as a poorly supported wood subfloor. However, concrete is porous. Moisture can move through it from the ground or remain trapped after the slab is poured.
That is why you should not treat every concrete floor as ready for installation.
Before starting, check four conditions:
- Moisture: The slab must meet the moisture limits specified for your flooring and any adhesive or underlayment.
- Flatness: The surface must be even enough to support the flooring without excessive movement.
- Cleanliness: Dust, grease, paint flakes, loose adhesive, and other debris must be removed.
- Condition: Cracks, loose patches, and damaged areas must be assessed and repaired where necessary.
Click-lock vinyl planks usually float above the subfloor. They connect to each other rather than being fixed directly to the concrete. This allows the assembled floor to expand and contract within the limits set by the manufacturer.
Some vinyl products are designed for glue-down installation instead. Their requirements can differ significantly. Always identify the exact flooring type before buying preparation materials.
Which Concrete Floors Are Suitable?
A sound, dry, and reasonably flat concrete slab is usually a suitable starting point. This includes many ground-floor slabs and properly constructed basement floors.
A garage slab requires extra care. Garages may have slopes for drainage, oil contamination, or moisture conditions that differ from those in living spaces. Standard residential vinyl plank flooring is not automatically suitable for every garage.
New concrete also needs special attention. A slab can look dry well before it has reached the moisture condition required by the flooring manufacturer.
If the concrete has standing water, persistent dampness, active leaks, or signs of water entering from the walls or floor, resolve the underlying problem before installing vinyl planks. A flooring membrane alone should not be used to conceal an ongoing water problem.
Step 1: Test the Concrete for Moisture Before Installation
Moisture testing should be one of your first tasks, not a final check after the room has been prepared. It can affect your choice of flooring, underlayment, moisture-control system, and installation method.
Concrete may release moisture even when the surface feels dry to the touch. This is particularly important in basements and ground-floor rooms where the slab is in contact with the ground.
Excess moisture can contribute to adhesive failure in glue-down installations. Depending on the flooring system, it may also cause mold-related concerns in materials beneath the floor, odors, or damage to adjoining construction. Some floating vinyl products tolerate certain moisture conditions better than others, but that does not mean every product is suitable for every slab.
What Is ASTM F2170?
ASTM F2170 is a standardized test method used to measure relative humidity inside concrete slabs with in-situ probes.
Instead of checking only the surface, this method measures the internal relative humidity of the concrete at specified depths. The results help installers and flooring professionals assess whether the slab meets the requirements of a particular flooring system.
The test must be performed according to the applicable standard, including the required hole depth, probe placement, conditioning, and measurement procedures. Follow the current standard and the product manufacturer’s instructions. When the result will determine whether a costly installation can proceed, using a qualified flooring or moisture-testing professional is a sensible choice.
What Is the Calcium Chloride Moisture Test?
The calcium chloride test, commonly associated with ASTM F1869, measures the moisture vapor emission rate from a concrete surface under specified test conditions.
It is different from an in-situ relative humidity test. The two methods do not measure the same property, so their results should not be treated as interchangeable.
Some flooring manufacturers accept one method, while others specify another or require additional testing. Follow the requirements for your exact product and installation system.
A general-purpose moisture meter can help identify areas that may need further investigation, but it should not automatically replace a test required by the flooring manufacturer.
How to Check Whether Your Concrete Passes
There is no single moisture limit that applies to every vinyl plank product. Requirements can differ according to the product construction, adhesive, moisture-control system, and installation method.
Use the following table as a practical decision guide.
| Test result or condition | What it means | What to do next |
|---|---|---|
| Moisture readings meet the product’s stated limits | The slab may be suitable from a moisture perspective | Confirm the remaining installation requirements |
| Readings exceed the manufacturer’s limits | The slab does not meet the specified conditions | Identify the moisture source and consult the manufacturer about approved mitigation |
| No valid test has been completed | The slab’s moisture condition is unconfirmed | Arrange the required test before proceeding |
| Visible dampness, water seepage, or active leaks | There may be an ongoing moisture problem | Resolve the source and assess the slab before installing flooring |
| Different areas produce significantly different readings | Moisture conditions may vary across the room | Investigate the affected areas and follow professional testing guidance |
These are decision categories, not universal numerical pass or fail limits. Use the actual limits in the installation instructions for your selected product.
For example, a homeowner installing click-lock LVP in a basement should not assume that a moisture reading accepted for one brand is also acceptable for another. A floating floor, a glue-down product, and a system with a separate moisture-control membrane can have different requirements.
Keep a record of the test method, date, locations, and results. This information can help if you need to discuss the installation with the flooring manufacturer or installer.
What Should You Do if the Concrete Fails the Moisture Test?
Do not cover the slab and hope the flooring will protect it.
First, determine whether the moisture comes from a plumbing leak, groundwater, poor exterior drainage, a missing or ineffective vapor retarder, or residual moisture in new concrete. Different causes require different solutions.
A suitable moisture-mitigation system may be an option when the slab is structurally sound but does not meet the flooring requirements. The system must be approved for the conditions, compatible with the flooring, and installed according to its technical instructions.
If water is entering through basement walls or the slab, address that issue first. The guidance in this article on how to waterproof your basement without professionals can help you assess common basement water problems and possible remedies.
Do not assume that an ordinary plastic sheet, a generic underlayment, or a coat of paint will correct excessive moisture. The wrong material can trap moisture or fail to provide the protection the flooring system requires.
Step 2: Check the Concrete for Cracks, High Spots, and Low Areas
Once moisture testing is complete, inspect the entire concrete surface. The slab does not need to look polished, but it must meet the flatness requirements for your flooring.
A floor can appear level while still having small dips or raised sections. These irregularities matter because click-lock planks need consistent support beneath their joints.
Use a Straightedge to Check Flatness
A long, rigid straightedge is one of the most useful tools for checking a concrete subfloor. A 6-foot straightedge is a practical choice for many residential projects. A 10-foot straightedge can help you inspect larger areas.
Place the straightedge on the concrete and move it across the room in several directions. Look for gaps beneath the tool and spots where it rocks over a raised area.
Measure any gaps with a ruler or feeler gauge. Mark the problem areas with chalk or a pencil that can be removed before installation.
Check these locations carefully:
- Along walls and doorways.
- Around floor drains or utility penetrations.
- Near cracks and previous repairs.
- Across the center of the room.
- Where the concrete meets another floor surface.
Do not assume that a small dip is harmless because the vinyl plank is flexible. Vinyl can bend over minor irregularities, but repeated movement can place stress on the locking joints.
What Flatness Tolerance Should You Use?
Flatness requirements depend on the flooring product. As one example, Shaw’s published guidance for a particular Sta-Tite vinyl plank and tile product specifies a maximum deviation of 1/8 inch over 6 feet or 3/16 inch over 10 feet. These figures are product-specific examples, not universal limits for all LVP flooring.
Use the exact tolerance in the instructions for your chosen product. If the instructions specify a stricter requirement, follow that requirement.
How to Identify High and Low Spots
A high spot often causes a straightedge to rock. It may also leave visible gaps on both sides of the raised area.
A low spot creates a gap between the concrete and the straightedge. You may see a similar problem around an old patch that has shrunk or worn away.
Mark each issue separately. This makes it easier to choose the right repair method rather than applying a leveling product across the entire floor without need.
Do Not Ignore Concrete Cracks
Small, stable hairline cracks are common in concrete. They do not always prevent vinyl installation, but they should be assessed before you cover them.
A crack that is widening, uneven across its edges, or associated with movement or water infiltration needs more attention. Filling a moving crack with an ordinary patching compound will not correct the underlying problem.
For stable cracks, use a repair product that is compatible with the concrete and the flooring system. Follow the repair product’s instructions for preparation, curing, and any required surface treatment.
If the slab has significant movement, vertical displacement, or repeated cracking, seek professional advice before proceeding.
Step 3: Prepare the Concrete Subfloor
Good subfloor preparation has a direct effect on the finished floor. Even expensive vinyl planks can perform poorly when installed over dust, loose material, or an uneven surface.
Work in stages. Remove anything that could interfere with the planks, then clean the slab, make repairs, and allow all products to cure.
Remove the Existing Floor Covering
If the concrete is covered with carpet, old vinyl, laminate, or another material, determine whether it must be removed.
Carpet and its padding are generally not suitable bases for floating vinyl planks. They compress under weight and allow too much movement.
Old flooring adhesives require special care. Some older materials and adhesives may contain asbestos. If you suspect asbestos, do not sand, grind, scrape aggressively, or otherwise disturb the material until it has been assessed under the applicable local rules.
Use only removal methods appropriate for the material. If the existing surface is firmly bonded and the new flooring manufacturer permits installation over it, verify that it is flat, stable, clean, and compatible before deciding to leave it in place.
Clean the Concrete Thoroughly
Sweep the floor, then vacuum it with a suitable vacuum. Pay attention to the edges and corners where fine dust tends to collect.
Remove grease, oil, paint flakes, loose sealers, and other contaminants using methods approved for the concrete and flooring system. If you wash the slab, allow it to dry fully and confirm that the moisture condition still meets the product requirements.
Do not apply a sealer simply to make the concrete look cleaner. Some sealers prevent adhesives or patching compounds from bonding properly.
After cleaning, run your hand over the surface. If a layer of loose dust remains, clean it again before continuing.
Remove Raised Areas Safely
Small concrete ridges or old patching material may need to be ground down. Use suitable equipment, protective eyewear, hearing protection, and appropriate respiratory protection.
Concrete grinding creates fine dust that can contain respirable crystalline silica. Use effective dust-control equipment and follow applicable safety requirements. For large areas or heavy grinding, hiring a professional may be safer and more efficient.
Do not grind an unknown coating or adhesive before checking whether it contains hazardous material.
Fill Low Spots With a Compatible Compound
Use a patching compound or self-leveling compound approved for the substrate and intended flooring system.
A self-leveling compound can help correct widespread shallow depressions, but it is not a solution for every uneven floor. Some products require a primer. Others have minimum and maximum application thicknesses. Some cannot be applied over certain coatings or damp concrete.
Read the product instructions before mixing anything.
For a small depression, a compatible floor patch may be sufficient. For a larger area, a self-leveling compound may provide a more consistent surface.
Follow the stated mixing ratio and working time. Spread the compound as directed, and allow it to cure for the specified period. Check the finished surface with your straightedge before installing the vinyl planks.
Do not use ordinary drywall compound, general-purpose filler, or an unsuitable cement mix to patch a floor. These materials may not provide the required strength or compatibility.
Recheck the Floor After Repairs
Once the repair products have cured, inspect the concrete again. Run the straightedge across the repaired areas and confirm that the surface meets the flooring manufacturer’s flatness requirements.
Vacuum away any remaining dust. Check that the repair material is firm and that no edges are loose or crumbling.
The floor should now be clean, flat, structurally sound, and ready for the next stage, provided the moisture requirements have also been met.
Step 4: Choose the Right Underlayment or Moisture Barrier
One of the most common questions about installing LVP over concrete is whether underlayment is necessary.
The answer depends on the flooring product. Some vinyl planks include an attached underlayment. Others require a separate approved underlayment, while some must be installed directly over the prepared subfloor.
Adding an extra layer without checking the instructions can create problems. A soft or overly thick underlayment may allow the floor to flex, putting pressure on the click-lock joints.
Do You Need Underlayment for Vinyl Plank on Concrete?
Not always.
If your vinyl plank already has an attached pad, the manufacturer may prohibit a second underlayment. If the product has no attached pad, a specific underlayment may be permitted or required.
Underlayment can help with sound reduction and minor comfort differences, depending on its construction. It does not replace proper concrete preparation. It cannot make a badly uneven slab suitable for flooring.
Read this guide to underlayment for vinyl flooring before buying a separate layer. Check thickness, density, moisture performance, and product compatibility rather than choosing an underlayment based only on price.
When Is a Moisture Barrier Needed?
A vapor barrier or moisture-control membrane may be required for some concrete installations. However, these terms do not all describe the same product or function.
A simple polyethylene sheet, an underlayment with a vapor retarder, and a professionally applied moisture-mitigation system are different solutions. They should not be treated as interchangeable.
Some floating vinyl products permit a specified sheet barrier over concrete. Others have their own requirements. Glue-down products may require a compatible mitigation system or adhesive designed for the measured moisture conditions.
The correct approach is to check the flooring instructions first, then confirm that the selected barrier is approved for the slab and flooring system.
Can You Install Vinyl Plank Directly on Concrete?
Yes, if the product allows direct installation and the concrete meets its requirements.
A suitable slab may not need a separate underlayment. A product with an attached pad may also be designed for installation over the properly prepared concrete surface.
Direct installation does not mean installing over unfinished or untested concrete. Moisture testing, cleaning, flatness checks, and repairs remain essential.
Special Considerations for Basements
Basements deserve extra care because groundwater, poor drainage, and seasonal moisture can affect concrete slabs.
If the room has a history of dampness, inspect the walls and floor for staining, musty odors, efflorescence, or visible water. These signs do not all prove the same moisture problem, but they deserve investigation before flooring is installed.
Do not rely on vinyl plank flooring to waterproof a basement. The floor covering does not correct exterior drainage issues or prevent water pressure from acting on the foundation.
If moisture is under control and the slab meets the product requirements, a suitable LVP system can be a practical basement flooring option.
Step 5: Gather the Tools and Materials
Prepare your tools before opening the flooring cartons. Having everything within reach makes installation easier and reduces the chance of damaging the planks while searching for equipment.
For a typical click-lock installation over concrete, you may need:
- Tape measure, pencil, chalk line, and carpenter’s square.
- Long straightedge and feeler gauge for checking flatness.
- Utility knife with suitable blades for scoring compatible vinyl planks.
- Fine-tooth saw or another cutting tool approved for your flooring.
- Spacers for the required expansion gap.
- Tapping block and pull bar designed for the flooring’s locking system.
- Rubber mallet, if permitted by the installation instructions.
- Vacuum, broom, and suitable cleaning supplies.
- Compatible concrete patch or self-leveling compound, if required.
- Approved underlayment or moisture-control product, if required.
- Safety glasses, gloves, and appropriate respiratory protection for dusty work.
You will also need the correct transition strips, baseboard or shoe molding, and any manufacturer-approved accessories for the room.
Do not use a generic tapping block that can crush the plank edges. A block designed for your locking system helps distribute force more evenly. Avoid striking the locking edge directly with a hammer.
Calculate How Much Vinyl Flooring to Buy
Measure the room’s length and width. For a simple rectangular room, multiply the two measurements to calculate the floor area.
For example, a room that is 12 feet long and 15 feet wide has an area of 180 square feet.
Add extra material for cuts, damaged pieces, and future repairs. The amount depends on the room shape and installation pattern. A straightforward rectangular room may need less extra material than a room with several alcoves, closets, or angled walls.
Check the coverage listed on each carton and round up to a whole number of cartons.
For a room with multiple sections, calculate each section separately and add the areas together. Include closets that will receive the same flooring.
Keep a few unused planks from the same product and color batch after the project is finished. They can be useful if a plank becomes damaged later.
Step 6: Prepare the Room and Plan the Layout
Planning the layout before installation helps avoid narrow strips along the walls and awkward cuts around doorways.
Start by removing furniture and other items from the room. Remove baseboards or shoe molding carefully if you intend to reinstall or replace them. Remove doors when necessary to make installation easier.
Check door clearances. Vinyl flooring can raise the finished floor height, which may cause a door to rub against the new surface.
Decide Which Direction the Planks Should Run
Many installers run planks along the longest dimension of a rectangular room. This can create a continuous visual line and may reduce the number of end joints.
However, the best direction also depends on adjoining rooms, natural light, doorways, and the flooring manufacturer’s layout guidance.
Lay a few loose planks on the floor to preview the appearance. Consider how the pattern will look from the main entrance and how it will connect with any adjoining flooring.
If you are comparing finishes for the rest of your home, these DIY flooring ideas can help you think about color, pattern, and transitions between rooms.
Plan the First and Last Rows
Measure the room’s width and divide it by the usable width of a plank, accounting for the required perimeter gaps.
This calculation estimates how many full rows will fit and how wide the final row will be.
If the final row would be very narrow, adjust the width of the first row where the manufacturer’s instructions allow it. This can create a more balanced appearance on both sides of the room.
Do not cut the first row until you have checked the measurements and confirmed the expansion requirements.
Mix Planks From Different Cartons
Open several cartons and compare the colors and grain patterns. Most wood-look vinyl flooring includes some variation between planks.
Mixing planks from multiple cartons helps distribute those differences across the room. Otherwise, a row of similar-looking planks may create an obvious block of repeated patterns.
Before installation, inspect the boards for damage, chipped locking edges, printing defects, or other visible problems. Set defective pieces aside rather than installing them and discovering the issue later.
Should You Acclimate Vinyl Plank Flooring?
Acclimation requirements vary by product.
Some rigid-core vinyl planks do not require traditional acclimation, while other products specify a period of storage under certain temperature and humidity conditions.
COREtec, for example, provides product-specific installation guidance and states that its flooring should be installed in a climate-controlled environment. Its requirements should not be assumed to apply to every vinyl plank brand.
Keep the flooring in the conditions specified by the manufacturer. Check the permitted room temperature and any requirements for heating or cooling systems before beginning.
Do not assume that leaving cartons in an uncontrolled garage or cold basement for several days satisfies the installation requirements.
Step 7: Install the First Row of Vinyl Planks
The first row sets the alignment for the rest of the floor. If it drifts away from the wall or the planks do not connect correctly, the error can continue across the room.
Take your time with this stage.
Mark a Straight Starting Line
Do not assume the wall is perfectly straight. Older rooms often have walls that bow or angle slightly.
Measure the required expansion gap from the starting wall and mark a line using a chalk line or another suitable method. Check that the line is straight and that the planned layout leaves enough room at the opposite wall.
Follow the manufacturer’s instructions for the expansion gap. The required space depends on the flooring product, room dimensions, and other conditions. Do not use a single measurement as a universal rule.
Cut the First Row to Fit
If the wall requires a cut edge, measure each plank carefully and cut it using the recommended tool.
Some vinyl planks can be scored with a utility knife and snapped along the score. Others may require a saw. The correct method depends on the plank’s construction and thickness.
Wear eye protection when cutting. If using a power saw, follow the tool manufacturer’s safety guidance and control dust and debris.
Place spacers along the wall to maintain the required expansion gap. The spacers should hold the flooring in position without forcing it tightly against the wall.
Connect the Planks
Click-lock systems use shaped edges that connect adjacent planks. The exact locking motion varies by product.
Some planks are installed at an angle and then lowered into position. Others use a different joining method. Follow the manufacturer’s installation sequence.
Check every connection as you work. The seams should close properly without forcing the joints.
If a plank refuses to lock, stop and inspect the edge. Dust, a damaged locking profile, or incorrect positioning may be the cause. Remove the plank and correct the problem rather than hitting it harder.
Check the Alignment Frequently
After installing the first few planks, check that the row remains straight and that the expansion gap is consistent.
Measure the distance from the row to the wall at several points. Small errors at the beginning can become more noticeable as additional rows are installed.
Keep the row aligned with your reference line. Adjust it before adding more flooring if necessary.
Step 8: Install the Remaining Rows
Once the first row is secure, continue across the room. The main goals are to maintain straight rows, stagger the end joints, protect the locking edges, and keep the required perimeter gap.
Stagger the End Joints
Avoid placing the end joints in consecutive rows at the same positions unless the product’s layout specifically requires a different pattern.
A staggered pattern generally looks more natural and reduces the appearance of repeated vertical seams.
The required minimum offset varies by manufacturer. Follow the installation instructions rather than choosing an arbitrary distance.
Use leftover pieces to begin new rows when their length meets the manufacturer’s minimum requirements. Avoid creating a row that starts with a very short piece simply to reduce waste.
Connect Each Row Correctly
Install each plank using the specified locking sequence. Keep the joining edges free from dust and debris.
Some systems require the long edge to be connected before the short edge. Others use a different sequence. Applying the wrong method can damage the locking profile even if the surface looks acceptable at first.
Use a tapping block only where the instructions permit it. Apply controlled force and stop if the joints do not close.
Do not use excessive force to correct a gap. Disassemble the affected section if needed and inspect the connections.
Check for Gaps as You Work
Run your eyes and fingers over the seams after each row. Look for raised edges, visible gaps, and joints that have not fully engaged.
A small gap may be easier to correct before the next several rows are installed.
Use good lighting to inspect the floor. A portable work light placed at a low angle can make raised edges and uneven joints easier to see.
Check the overall alignment every few rows. Do not rely only on the appearance of the latest plank.
Avoid Repeating the Same Wood Pattern
Wood-look flooring often includes printed grain patterns. If similar patterns appear next to each other, the result can look artificial.
Before locking a plank into place, compare its pattern with the surrounding boards. Move pieces around when necessary, while keeping the required joint stagger.
Also check the plank orientation. Some products have directional designs or instructions that affect how the pieces should be arranged.
Keep the Floor Free From Debris
Small pieces of concrete, dried patching compound, and other debris can become trapped beneath the planks.
Vacuum the working area as needed. Avoid dragging tools across the finished floor, and do not leave loose spacers beneath installed rows.
If you find debris under a plank after it has been locked into place, remove the affected section and clean the area. Trying to crush the debris beneath the floor can create a raised spot or damage the locking joints.
Step 9: Cut Vinyl Planks Around Walls, Pipes, and Doorways
Most rooms require more than straight cuts. You may need to work around door frames, heating pipes, columns, corners, and irregular wall shapes.
Measure each cut separately. Concrete rooms are not always perfectly square, and nearby walls may have slightly different angles.
Cutting Planks to Length
Measure the gap where the plank will fit. Account for the required expansion space at the wall or fixed object.
Mark the cutting line with a pencil and square. Check the measurement before cutting.
For score-and-snap flooring, make a controlled score using the recommended blade and snap the plank according to the manufacturer’s instructions. For other products, use an appropriate saw with a suitable blade.
Smooth any rough edges if the manufacturer permits it. Keep the finished cut hidden beneath the baseboard or molding where possible, without reducing the required expansion space.
Cutting Around Door Frames
Door frames can make a finished floor look untidy when the installer cuts around the casing instead of allowing the flooring to fit neatly beneath it.
Where appropriate, use a jamb saw or suitable hand tool to undercut the door casing. The cut should provide enough clearance for the vinyl plank to slide underneath.
Use a spare plank and the required underlayment, if applicable, as a height guide. This helps establish the correct cutting height.
Before cutting, confirm that the casing material can be safely undercut and that there are no hidden services or other obstructions.
Cutting Around Pipes
Measure the pipe location from the edges of the plank. Transfer those measurements to the plank and mark the opening.
The hole must provide the clearance required by the flooring manufacturer. An opening that is too tight can restrict movement around a fixed pipe.
Use an appropriate drill bit or cutting tool, depending on the plank material and hole size. Make sure the finished cut is clean and that the plank can be installed without forcing it.
A suitable pipe collar or trim ring can cover the visible gap. It should not clamp the floating floor tightly against the pipe.
Fitting Around Doorways and Fixed Objects
Doorways may require a transition strip or another approved finishing profile. The correct choice depends on the height and type of the adjoining floor.
Heavy built-in cabinets, kitchen islands, and other fixed objects need special attention. Floating flooring usually requires room to expand and contract. The manufacturer may prohibit placing certain fixed loads on top of the floor or require a different installation detail.
Read the instructions before installing planks beneath or around heavy permanent fixtures.
If the room has an unusual layout, plan these details before you install the main field of flooring. It is easier to adjust the layout at the beginning than to correct awkward cuts near the end.
Step 10: Install the Final Row
The last row often requires lengthwise cuts because the remaining space is narrower than a full plank.
Measure the distance between the installed flooring and the wall at several points. Remember to subtract the required expansion gap. Do not assume the wall runs parallel to the last installed row.
Transfer the measurements to the planks and cut them to the required width. If the wall is uneven, each plank may need a slightly different cut.
Use the appropriate installation tool to connect the final row. A pull bar can help in tight spaces, provided it is suitable for your flooring system. Apply controlled pressure and protect the plank edges from damage.
Check that the final row lies flat and that the expansion gap remains open. Do not force the planks tightly against the wall to eliminate a visible gap.
Once the row is installed, remove temporary spacers carefully. Inspect the entire floor before adding the finishing trim.
Step 11: Install Baseboards, Transition Strips, and Door Trim
Finishing materials cover expansion gaps and create a clean connection between the new floor and the room’s walls or adjoining surfaces.
However, the trim must not prevent the floating floor from moving.
Reinstall the Baseboards
Reinstall the original baseboards if they are in good condition, or fit new ones if the existing pieces are damaged.
Attach the baseboards to the wall, not through the vinyl planks. The trim should cover the expansion gap without pressing down so tightly that it restricts floor movement.
If baseboards cannot cover the gap, suitable shoe molding may provide a neat finish. Attach the molding to the wall or baseboard rather than fastening it through the flooring.
Fill and paint the trim as needed, taking care to keep paint and adhesive off the finished floor.
Fit Transition Strips
A transition strip may be necessary where the vinyl floor meets tile, carpet, hardwood, or another flooring material.
Choose a profile that suits the height difference and the type of adjoining floor. Follow the transition manufacturer’s installation instructions.
Do not assume that every transition strip should be screwed through the floating floor. Some systems require attachment to the subfloor or another designated fixing point.
For a doorway connecting vinyl plank to tile, for example, the transition should protect the exposed edges and allow the flooring to move as intended.
Check Door Operation
Rehang any doors that were removed. Open and close them several times to confirm that they clear the new floor.
If a door rubs, determine whether it needs adjustment or trimming. Do not press the vinyl planks down to create more clearance.
Check that doorways, closet doors, and floor-level vents are all functioning properly before returning furniture to the room.
Step 12: Inspect and Clean the Finished Floor
A final inspection helps identify small problems before you move furniture back into the room.
Walk across the entire floor and look for visible gaps, raised joints, damaged edges, and areas that move unexpectedly. Pay close attention to doorways and the edges of the room.
A floating vinyl floor may have some natural sound or movement characteristics, but obvious rocking, repeated clicking, or separated joints can indicate an installation problem.
If you notice an issue, check the manufacturer’s guidance before attempting a repair. Some problems require removing planks to correct the underlying cause.
Clean the Floor Safely
Remove dust and loose debris with a suitable vacuum or soft broom. Use a cleaner approved for the flooring and follow the manufacturer’s maintenance instructions.
Avoid abrasive cleaning tools, harsh solvents, and products that leave a waxy or oily residue unless specifically approved.
Do not flood the floor with water. Although many vinyl planks have water-resistant surfaces, water can still affect surrounding construction and enter through edges or other openings.
Protect the Flooring From Furniture
Before moving furniture back into the room, attach suitable protective pads to chair and table legs.
Use furniture-moving equipment that will not scratch the surface. Avoid dragging heavy items across the new floor.
For rolling chairs, use a floor protector or suitable chair casters recommended for resilient flooring.
Allow any sealants, adhesives, or finishing products used around the room to cure according to their instructions before normal use.
Common Mistakes to Avoid When Installing LVP Over Concrete
Even a straightforward click-lock installation can develop problems when preparation steps are skipped.
The following mistakes deserve particular attention.
1. Skipping Moisture Testing
This is one of the most important mistakes to avoid. A dry-looking concrete slab may still have excessive internal moisture or moisture vapor emissions.
Test the slab using the method required by the flooring manufacturer. Keep the results and address any failed readings before installation.
2. Installing Over an Uneven Surface
Vinyl planks are not a replacement for concrete leveling. Excessive dips and raised areas can cause movement, stress the joints, and create an uneven appearance.
Use a straightedge to identify problem areas and repair them with compatible products.
3. Adding the Wrong Underlayment
A second underlayment may be unsuitable for vinyl flooring that already has an attached pad.
An overly soft layer can allow too much movement underfoot. This can place stress on the locking system.
Check the product instructions before adding any layer between the concrete and the planks.
4. Ignoring Expansion Gaps
Floating floors need room to expand and contract. If the planks are tightly trapped by walls, door frames, cabinets, or molding, the floor may buckle or develop joint problems.
Maintain the specified clearance around the perimeter and other fixed obstructions.
5. Forcing the Locking Joints
A plank that does not connect properly may have debris in the joint, incorrect positioning, or a damaged edge.
Do not keep striking it in the hope that the gap will close. Remove the piece, inspect it, and correct the cause.
6. Using the Wrong Repair Material
Ordinary filler or an incompatible patch may crumble, shrink, or fail to bond to the concrete.
Use a product designed for concrete subfloor preparation and approved for the intended flooring system.
7. Rushing the Preparation Work
Floor patching, moisture mitigation, and self-leveling products may require specific curing periods.
Covering them too early can affect their performance or interfere with installation. Follow the stated drying and curing times rather than relying on touch alone.
8. Forgetting About Doorways and Fixed Fixtures
A poor transition or an incorrectly fitted door frame can affect both appearance and floor movement.
Plan the doorway details before laying the main floor. Confirm how the manufacturer wants the flooring handled around permanent fixtures.
How Much Does It Cost to Install Vinyl Plank Flooring Over Concrete?
The total cost depends on the flooring you choose, the size of the room, the amount of preparation needed, and whether you install it yourself or hire a professional.
The flooring itself is only one part of the budget. Concrete preparation can add a significant amount if the slab needs patching, grinding, moisture mitigation, or extensive leveling.
For a more useful estimate, divide the project into five cost categories.
| Cost category | What affects the cost |
|---|---|
| Vinyl plank flooring | Brand, thickness, wear layer, design, and product construction |
| Subfloor preparation | Grinding, patching, self-leveling compound, and cleaning |
| Moisture control | Testing, approved membranes, and any required mitigation |
| Installation supplies | Cutting tools, underlayment, spacers, and accessories |
| Finishing and labor | Baseboards, transition strips, installation labor, and waste removal |
How to Keep the Project Within Budget
Measure the room carefully before purchasing materials. Buy enough flooring to cover the area plus a reasonable allowance for cuts and future repairs.
Compare products based on their installation requirements as well as their purchase price. A cheaper product may not be the best value if it requires additional materials or is unsuitable for your concrete conditions.
Do not cut corners on moisture testing or subfloor preparation. These steps can help prevent expensive repairs after the flooring has been installed.
If you are comparing different materials for your renovation, the guide to affordable flooring options provides another starting point for evaluating suitable floor coverings.
For a large room, a badly uneven slab, or a basement with moisture concerns, obtain a detailed quote that separates preparation work from flooring installation. This makes it easier to compare contractors fairly.
When Should You Hire a Professional?
DIY installation is realistic for many homeowners when the concrete is sound, the moisture condition is acceptable, and the chosen product uses a manageable installation system.
Professional help may be appropriate when the project involves:
- Persistent moisture or water intrusion.
- Extensive grinding or leveling.
- Significant or moving concrete cracks.
- Suspected asbestos in existing flooring or adhesive.
- Complicated layouts, large areas, or difficult transitions.
- A glue-down installation with demanding substrate requirements.
A professional can also help select an appropriate moisture-control system when the slab does not meet the flooring manufacturer’s limits.
Before hiring someone, ask which moisture test they will use, how they will check flatness, which preparation products they intend to apply, and whether the proposed installation follows the flooring manufacturer’s requirements.
Request a written scope of work. It should explain what is included in subfloor preparation, what happens if moisture readings fail, and whether trim and transitions are part of the quote.
Common FAQs
Can you install vinyl plank flooring directly on a concrete slab?
Yes, if the slab is clean, flat, structurally sound, and within the moisture limits specified for the flooring. Some products can be installed directly over prepared concrete, while others require an approved underlayment or moisture-control system.
Do you need a moisture barrier under vinyl plank flooring on concrete?
Not always. The requirement depends on the flooring construction, installation method, and concrete conditions. Check whether the manufacturer requires a specific vapor retarder or moisture-mitigation system. Do not substitute a generic plastic sheet unless the instructions permit it.
How long should new concrete dry before installing vinyl planks?
There is no universal waiting period that guarantees a new slab is ready. Concrete curing time and flooring readiness are different matters. Temperature, humidity, slab thickness, and other conditions affect drying. Use the moisture test and acceptance limits required by the flooring manufacturer before installation.
Can you install LVP over painted concrete?
Possibly, but only if the flooring manufacturer’s instructions permit it and the paint is compatible with the installation system. Loose, peeling, or unsuitable coatings may need to be removed. Do not grind or scrape an unknown coating until you have assessed whether it contains hazardous material.
Can you install vinyl plank flooring over a cracked concrete floor?
Small, stable cracks may be repairable before installation. However, moving cracks, uneven crack edges, and cracks associated with water infiltration need further assessment. Repair the cause where necessary and use a compatible repair system before covering the slab.
Is a self-leveling compound necessary before installing vinyl plank flooring?
No. It is needed only when the concrete has low areas or other irregularities that exceed the flooring manufacturer’s flatness limits. Minor defects may need a suitable patch instead. Raised areas may require grinding. Choose the preparation method according to the actual condition of the slab.
Can vinyl plank flooring be installed in a basement?
Yes, if the product is suitable for the intended location and the concrete meets its requirements. Basements need careful moisture assessment because groundwater and seasonal conditions can affect the slab. Resolve active leaks and water intrusion before installation.
Should vinyl planks run parallel or perpendicular to the room’s longest wall?
Running planks along the longest dimension is a common choice, but it is not a strict rule. Consider natural light, adjoining rooms, doorway positions, and the manufacturer’s layout instructions. Plan the first and last rows to avoid unnecessarily narrow cuts.
Do vinyl planks need an expansion gap around the walls?
Most floating click-lock systems require a perimeter gap. The size depends on the product and installation conditions. Follow the manufacturer’s specified clearance around walls, pipes, door frames, and other fixed objects. Baseboards should cover the gap without pinning down the floor.
Can you install vinyl plank flooring over radiant floor heating in concrete?
Some vinyl flooring products are compatible with certain radiant heating systems, but not all are. Check the manufacturer’s guidance for permitted surface temperatures, heating-system operation, and installation methods. The heating system should be operated according to the specified procedure before, during, and after installation.
Final Checklist Before You Start
Use this checklist to confirm that the main preparation and installation tasks are complete.
- Confirmed that the selected vinyl plank product is suitable for concrete.
- Completed the required moisture test and checked the manufacturer’s limits.
- Inspected the slab for cracks, water intrusion, and uneven areas.
- Removed unsuitable materials and cleaned the concrete.
- Repaired low spots and high spots using compatible products.
- Confirmed whether separate underlayment or a moisture barrier is required.
- Measured the room and planned the first and last rows.
- Checked the manufacturer’s temperature and acclimation requirements.
- Installed the planks with the correct joint stagger and expansion gaps.
- Finished the edges and doorways without restricting floor movement.
- Inspected the completed floor and cleaned it using approved products.
Conclusion
Installing vinyl plank flooring over concrete is a manageable DIY project when you prepare the slab correctly and follow the requirements for your chosen product.
Start with moisture testing. Check the concrete for cracks and uneven areas. Clean the surface, make compatible repairs, and confirm whether the flooring needs a separate underlayment or moisture-control system. Once the slab is ready, plan the layout, install the planks carefully, and leave the required expansion gaps around the room.
Do not rush the preparation stage. It affects how well the flooring fits, how stable the joints remain, and whether the finished floor performs as intended.
For product-specific instructions, consult the official Shaw Floors vinyl installation guidance or the technical documents supplied with your selected flooring. Requirements for moisture, flatness, underlayment, and expansion can vary between products.
If you are planning more home improvement work, BYB Good Idea offers practical resources to help you compare materials, prepare surfaces, and approach DIY projects with greater confidence. Use the guides below to plan your next step.
Before buying materials, check your slab’s condition and read the installation instructions for the exact product you plan to use. A little preparation now can help you avoid unnecessary rework and achieve a cleaner, more professional-looking result.