
You picked up a piece of scrap wood. A friend handed you a wood burning pen. You pressed the hot tip to the surface. A thin brown line appeared where nothing was before.
It felt strange. It felt good. It felt like drawing with fire instead of ink.
Then you wondered: is this a real craft, or just something people do at summer camp? It is real. It has a name. Thousands of hobbyists and professional artists build entire careers around it.
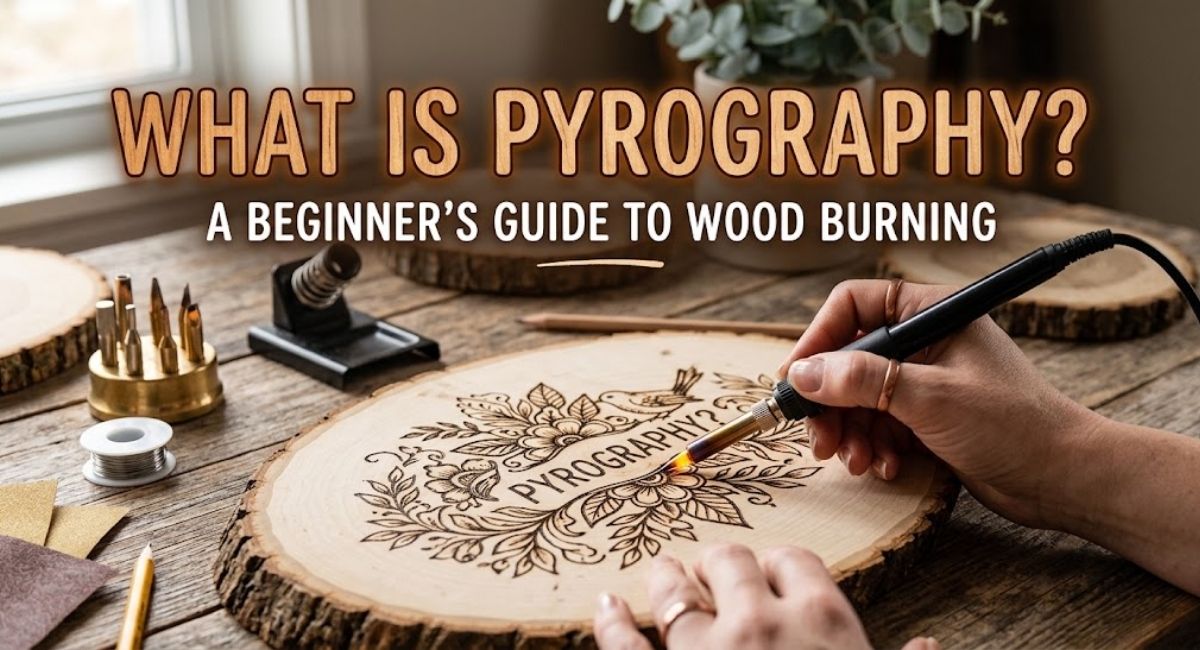
That craft is pyrography. People also call it wood burning. If you have asked yourself what is pyrography and whether you could learn it without art school training, this guide answers both questions.
Pyrography is the art of creating designs on wood using controlled heat instead of ink or paint. It sits between drawing and traditional wood craft. Unlike wood carving, which removes material with blades and gouges, pyrography adds detail by scorching the surface with a heated tip. The result can be a simple line drawing or a detailed portrait. It depends on your skill level and your tools.
This guide is for someone starting from zero. It explains what pyrography is. It covers the tools and materials you need. It shows you how to pick a wood burning kit for beginners. It walks you through the skill step by step, so you do not waste money on gear you do not need yet.
What Is Pyrography, Exactly
The word pyrography comes from Greek. It means fire and writing. In simple terms, it means using controlled heat to burn marks, shading, and texture into a surface. Wood is the most common surface. But pyrography also works on leather, gourds, cork, and some types of paper.
The main tool is the pyrography pen. Some people call it a wood burning pen or a wood burner. It looks like a soldering iron, but it is built for controlled mark-making. The tip heats up. As you drag it across wood, the heat chars the fibers. This leaves a permanent brown to black line. Change the tip. Change the pressure. Change your speed. Each change gives you a different mark.
Pyrography is not new. Burned wood decoration shows up in many cultures across history, from Egyptian artifacts to Victorian “poker work.” In poker work, people decorated household items with a heated metal rod. What has changed is the technology. Modern pens offer adjustable heat, swappable tips, and far more control than an old metal poker ever gave.
How Pyrography Differs From Wood Carving
People often group wood burning and wood carving together. Both use wood as a raw material. But the tools and techniques are quite different.
Carving removes material. You use knives, chisels, or gouges to shape the wood in three dimensions. If you have looked into wood carving for beginners, you already know it takes practice to control a blade and read the wood grain.
Pyrography does not remove wood. It marks the surface with heat. The final piece stays flat, or close to flat. The design comes from contrast and shading, not depth. Some artists combine both crafts. They carve a shape first, then add burned detail for texture or shadow. If you already know how to pick wood by grain and hardness, that skill carries over directly into pyrography.
Why Pyrography Has Become a Popular Hobby
A few reasons explain why wood burning has grown from a niche craft fair activity into a real hobby with a strong following.
First, it is cheap to start. A decent beginner pyrography pen costs less than a mid-range set of paints. A single basswood board can last through several practice sessions.
Second, the learning curve is gentle. You do not need to draw well to begin. Simple lines, dot shading, and basic patterns look finished even on your first try. That keeps you motivated early on.
Third, you get a finished result fast. One evening can produce a coaster, an ornament, or a small sign. That is rewarding if you want to see progress without waiting months.
Fourth, it fits well with the wider wood craft world. If you already enjoy beginner woodworking projects, pyrography feels like a natural next step. It uses similar materials. It asks for the same respect for wood grain and surface prep.
There is also a calming side to this hobby. Slow, repetitive, focused work has a real effect on stress. The same steady focus that shows up in the therapeutic benefits of wood carving shows up in wood burning too. Both need slow, deliberate movement and quiet attention.
Essential Pyrography Tools and Materials
Before you buy anything, learn what each tool actually does. Beginners often overspend on accessories they will not touch for months. Or they underspend on the one tool that matters most: the pen itself.
The Pyrography Pen
There are two main types of wood burning pens.
Solid point burners use a fixed or adjustable metal tip. The tip heats through direct electrical resistance. These are the most common style in wood burning kits for beginners. They are simple, affordable, and good enough to learn the core skills.
Wire nib burners use swappable wire tips. These tips heat and cool almost instantly. They give more control for fine shading and detail work. Advanced hobbyists and professionals like them because you can shift temperature mid-project. But they cost more, and they take longer to learn.
For your first purchase, choose a solid point burner with adjustable temperature. It will not hold you back creatively for a long time. It is also far less confusing than juggling several wire tips before you understand basic pressure control.
Wood Burning Kit for Beginners
A wood burning kit for beginners usually includes the pen, a few swappable tips, a stand for the hot pen, and sometimes a small practice board. Walnut Hollow has built a strong name in this space. Their entry-level kits are easy to find, priced fairly, and packed with enough tip variety to try line work, shading, and basic lettering. You will not need a second purchase right away.
When you compare kits, look at three things: temperature control, tip variety, and stand quality. A wobbly stand is a real safety issue, since the tip stays hot for a while after use.
| Feature | Basic Fixed-Temperature Kit | Adjustable Temperature Kit |
| Price range | Lower | Moderate |
| Temperature control | None or limited | Full dial control |
| Best for | Simple line work, first attempts | Shading, detail, longer-term use |
| Learning curve | Very easy | Slightly steeper, more capable |
Wood Choices for Pyrography
Not every wood burns well. Dense hardwoods can scorch unevenly and give off a lot of smoke. Some softwoods have too much resin and sap. This causes uneven color and a bad smell when heated.
Basswood is the standard choice for beginners, and for good reason. It has a light, even color. Its grain is tight but soft. It has very little natural resin. This means it burns smoothly and gives clean, steady lines. Basswood is also cheap and easy to find. Craft stores sell it as pre-cut boards, rounds, or blank plaques made for pyrography and carving.
Other woods work once you gain more control. Birch plywood, poplar, and pine all work, though pine’s resin can cause popping and uneven burns in some boards. If you want to know how wood choice affects tool work in general, the same logic behind picking wood by its difference between hardwood and softwood applies well to pyrography too. Grain direction and surface prep matter in both crafts.
Additional Supplies Worth Having
A few extra items make the process smoother. None of them cost much.
- Fine grit sandpaper, around 220 grit, to smooth the wood before burning
- A pencil to sketch your design lightly before you burn over it
- A heat-resistant mat or tile to protect your work surface
- A small fire extinguisher or damp cloth nearby, as a safety precaution
How to Start Pyrography Step by Step
Learning how to start pyrography comes down to a few habits. Build these before you touch a “real” project. Rushing into a finished piece before you understand pressure and speed usually leads to frustration. So practice matters more than most beginners expect.
Step One: Prepare Your Wood Surface
Sand your basswood board lightly, even if it looks smooth. Dust and rough patches affect how well the tip glides. They also affect how the burn takes to the surface. Wipe away sawdust with a dry cloth.
Step Two: Sketch Before You Burn
Use a pencil to lightly sketch your design onto the wood. Or trace a printed design with graphite transfer paper. Keep the lines light. You are not making a finished drawing. You are making a guide for the pen to follow.
Step Three: Warm Up the Pen and Test on Scrap
Every pen behaves a bit differently. Every board of wood, even from the same species, can burn a bit differently based on grain density. Always test your heat and pressure on scrap wood first. Use the same type of wood as your project.
Step Four: Practice Basic Strokes
Before you attempt a full picture, spend time on three basic strokes.
Outlining uses slow, steady pressure to make clean, even lines. Speed affects darkness. Move slower for a darker line. Move faster for a lighter one.
Shading uses light pressure. Use small circles or back-and-forth strokes to build up tone, much like shading with a pencil.
Stippling builds texture from small dots. It works well for fur, feathers, or soft gradients.
Step Five: Work in Layers
Do not try to get the final shade in one pass. Build darkness slowly with several light passes. This gives you more control. It also lowers the risk of burning too deep or too dark in one spot.
Step Six: Finish and Seal
Once your design is done, sand away any stray pencil marks. Add a food-safe or standard wood sealant if the piece will get handled often, like a coaster or cutting board. A clear finish also deepens the contrast between burned and unburned wood. This makes the final piece look more polished.
Common Pyrography Tools Explained
Once the basics feel easy, most hobbyists expand their tip collection. Each tip shape makes a different kind of mark. Knowing what each one does saves you a lot of trial and error.
| Tip Type | Typical Use |
| Writing or universal tip | Outlining, lettering, general detail |
| Shading tip | Broad tonal shading and gradients |
| Ball or round tip | Dot work, texture, stippling |
| Flow tip | Smooth, wide, even lines for backgrounds |
Beyond tips, some pyrography artists add a few extra wood craft tools over time. This helps if you plan to combine burning with light carving or shaping. A general list of wood carving tools can help you see which hand tools might be worth adding later. This matters most if you want to shape edges or add relief detail next to your burned designs.
Safety Considerations Beginners Often Overlook
Pyrography uses an electric tool. It regularly reaches 600 to 1000 degrees Fahrenheit, depending on the setting and tip. That is much hotter than most kitchen appliances. The risk is easy to underestimate, since the tip itself is small.
A few safety habits matter here. Work in a space with fresh air. Burning wood releases smoke and fine particles. Breathing that in for a long time in a closed room is not something to ignore. Never leave the pen resting on your work surface, even for a moment. Most stands exist to keep the hot tip away from anything flammable. Keep paper, fabric, and hair away from your work area. Let the pen cool fully before you change tips or pack it away. Tip changes on a hot pen are a common cause of small burns.
None of this should sound scary. Millions of hobbyists burn wood safely every week. It just asks for the same respect you would give any tool that makes real heat, like a soldering iron or a hot glue gun.
Choosing Your First Project
Your first project matters more than most beginners think. A design that is too detailed will frustrate you early on. A design that is too simple will not teach you the skills you need next.
Good starting projects include simple geometric patterns, a single-word sign, a basic outline of an animal or leaf, or a small set of coasters with a repeating pattern. These are small enough to finish in one or two sessions. That keeps you motivated. They also teach outlining and light shading without asking for advanced control.
As you build confidence, you can move toward portraits, detailed landscapes, or mixed pieces that combine burning with paint or carving. If you already enjoy general beginner woodworking projects, pyrography fits naturally into signage, furniture accents, or gift items you already make.
How Pyrography Fits Into the Wider Wood Craft World
Pyrography deserves attention because it fits so well with other wood-based hobbies. If you already carve, build furniture, or work with reclaimed wood, you likely have most of the raw material you need to start burning too. A leftover offcut from a furniture project. A basswood blank bought for a carving attempt that did not work out. A plain wood sign blank. Any of these can become a pyrography surface.
This overlap is part of why pyrography has grown into a real sub-craft, not just a passing trend. It shares the same respect for grain and material choice as essential woodworking tools for beginners require. But it offers its own visual style, built on contrast and line instead of shape and depth.
The history documented on Wikipedia’s overview of pyrography shows roots stretching back centuries across many cultures. This is a well-established art form, not a passing trend.
Common Questions About Pyrography and Wood Burning
Is pyrography hard to learn?
The basics are easy to pick up in a few practice sessions. Clean outlining and simple shading come quickly. Advanced shading, portraits, and fine detail take months of regular practice to master, much like learning to draw.
What is the best wood for a beginner to practice on?
Basswood is the top choice. Its light, even grain and low resin content make it burn smoothly and give clean, steady results.
Do I need an expensive pen to start?
No. A basic adjustable-temperature solid point burner from a known brand is enough to learn outlining, shading, and stippling. Wire nib pens help later, but you do not need one to learn the basics.
Can pyrography be done on materials other than wood?
Yes. You can burn leather, gourds, cork, and some types of paper. Each material behaves differently. You may need to adjust your heat setting and take extra safety steps.
Is pyrography safe to do indoors?
Yes, as long as your space has fresh air and you follow basic precautions around heat and smoke. Work near an open window or run a small fan to clear smoke and fine particles.
How long does it take to finish a small pyrography project?
A simple design on a small board can take one to two hours. More detailed pieces with heavy shading can take several sessions over days or weeks.
Final Thoughts
Pyrography rewards patience. It does not ask for years of training before you see results. One pen, a few basswood boards, and an evening of practice are enough to know if this hobby is for you. From there, the path is open. Simple decorative signs. Detailed portraits. Or a mix of wood burning and carving alongside crafts you already enjoy.
If you want a new hobby that fits well with woodworking and carving, wood burning is worth a try. Start with a basic wood burning kit for beginners. Practice on basswood scraps before you start a real project. Build your skill one stroke at a time.
At BYB Goood Idea, we cover clear, practical guides for wood craft hobbies just like this one. We write for people who want real instructions, not fluff. Browse our other wood craft guides to keep building your skills. If pyrography turns out to be your thing, come back for more project ideas as you grow into the craft.
Helpful resources for getting started:
- A basic adjustable-temperature wood burning kit from a trusted brand like Walnut Hollow
- Pre-cut basswood boards or blanks from a local craft store
- A ventilated workspace with a heat-resistant mat
- Reference sketches or simple pattern books for your first few projects