Many people utilize dollhouses as a creative outlet in addition to being a beloved childhood toy. People can express their creativity and craftsmanship while engaging in a fun hobby of building and decorating dollhouses. The creation of distinctive wooden furniture for dollhouse to decorate the little interiors is one of the most delightful parts of customizing dollhouses. To help you create your own tiny works of art, we’ll examine a variety of do-it-yourself wooden furniture projects in this blog and offer detailed instructions.
Choosing the Right Materials
Getting all of the materials together is a must before starting to make miniature furniture. Here’s a short list to get you going:
- Balsa wood or basswood sheets: These woods are lightweight and easy to work with, making them ideal for miniature furniture.
- Wood glue: For joining little wooden pieces together, choose an adhesive that is robust and dries quickly.
- Sandpaper: To smooth off uneven surfaces and edges, use fine-grit sandpaper.
- Cutting tools: To shape and size wood to the desired dimensions, a hobby knife or miniature saw will come in handy.
- Pencil and ruler: These implements will assist you in precisely marking and measuring the wood before cutting.
- Paints and brushes: Select colorful acrylic paints to give your furniture items individuality.
- Optional embellishments: For a little extra flair, think about adding ornamental pieces like beads, buttons, or leftover fabric.
Basic Furniture Designs and Construction Techniques
- Table and Chairs: Begin with a straightforward circular or rectangular table. For the table legs, cut four sections of identical length, and for the surface, cut one larger piece. Make sure the legs are equally spaced and adhere them to the underside of the tabletop with glue. For chairs, cut four shorter pieces for the legs and two longer pieces for the seat and backrest. After assembling the chair by fastening the legs to the seat and backrest, paint it in the color combination you have chosen.
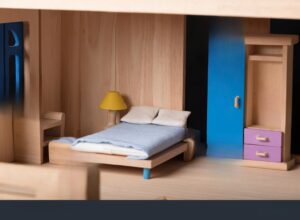
- Bed: Cut two long sections for the sides and two shorter pieces for the head and footboard to make a comfortable bed frame. After joining them to create a rectangle frame with glue, add thin slats across to support the mattress. Before attaching a piece of felt or fabric to serve as the mattress, paint and embellish the bedframe.
- Bookshelf: Cut two longer pieces for the sides and numerous smaller rectangles for the shelves to assemble a tiny bookshelf. Make sure there is adequate room between each shelf for small books or decorative items, then affix the shelves between the side pieces at equal intervals. For added realism, paint the bookshelf and add elements like small plants or fake books.
Advanced Furniture Projects
Once you’ve mastered the basics, challenge yourself with more intricate furniture designs:
- Upholstered Sofa: Construct a tiny sofa with leftover foam or fabric for the cushions and balsa wood for the frame. After cutting the wood pieces to fit the contour of the sofa, glue them together. To make cushions, cut foam to the appropriate size, cover it with fabric, and sew or glue the edges shut. Before painting and reupholstering the sofa, add the armrests and legs.
- Kitchen Cabinets: Using thin sheets of balsa wood, design and assemble miniature kitchen cabinets. To create the cabinet structure, cut the parts for the shelves, sides, and doors, then glue them together. Apply your preferred paint color to the cabinets and, for added authenticity, add small knobs or handles.
- Grandfather Clock: Use printed clock faces and balsa wood for the frame to make a lovely grandfather clock. Cut the wood pieces for the base, columns, and top of the clock to build its framework. Attach the printed clock face to the front by gluing them together. Apply paint to the clock and add ornamental elements, such as a pendulum or gold accents.
Tips for Success
- Particularly when working with little pieces of wood, take your time and exercise caution.
- Experiment with different paint colors and techniques to achieve the desired look for your furniture pieces.
- To make your furniture stand out, don’t be scared to alter designs or add distinctive details.
- Because making small furniture can be complex and time-consuming, exercise perseverance and patience.
- Explore online tutorials and communities for inspiration and guidance from fellow dollhouse enthusiasts.
Conclusion
Making your own wooden furniture for dollhouse is a creative and fulfilling project with countless possibilities. In the world of miniature handicraft, there’s always something new to discover and learn, regardless of your level of experience. You can add exquisitely made furniture pieces that express your individual style and creativity to your dollhouse interiors by following the tips and instructions provided in this blog. So get your supplies ready, let your imagination run wild, and relish the delight of creating your small world, one piece of wooden furniture at a time.