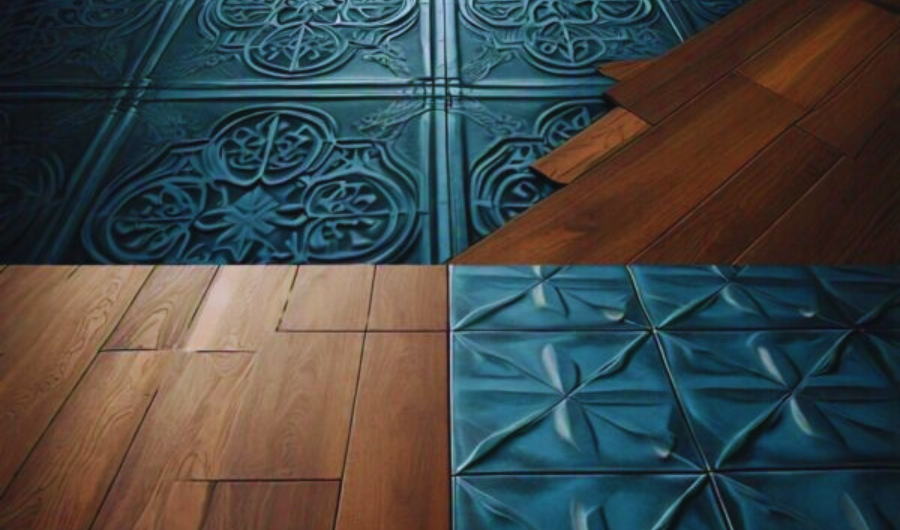
The transition between various types of surfaces can make or break a space’s aesthetic appeal when it comes to flooring. Going from tile to wood floor transition is one of the most popular and visually arresting transitions. This transition is prevalent in homes where the dining area or living room (which usually has wood flooring) meets the kitchen or bathroom (which are usually tiled rooms). The overall appearance and feel of your house can be improved by creating a smooth and fashionable transition between these two materials. The nuances of tile to wood floor transitions will be thoroughly examined in this book, along with the many methods, supplies, and factors to consider, including wood floor texture, to achieve a perfect finish.
Understanding the Importance of a Good Transition
A well-executed transition between tile and wood flooring serves both functional and aesthetic purposes. Here are some key reasons why a successful transition is important:
- Aesthetic Appeal: A smooth transition produces a coherent look, making the space appear more harmonious and well-designed.
- Safety: Proper transitions help to avoid tripping hazards, particularly in high-traffic areas.
- Durability: Making sure the transition is done correctly can help prevent damage to the borders of both tile and wood flooring, extending their life.
Types of Tile to Wood Floor Transitions
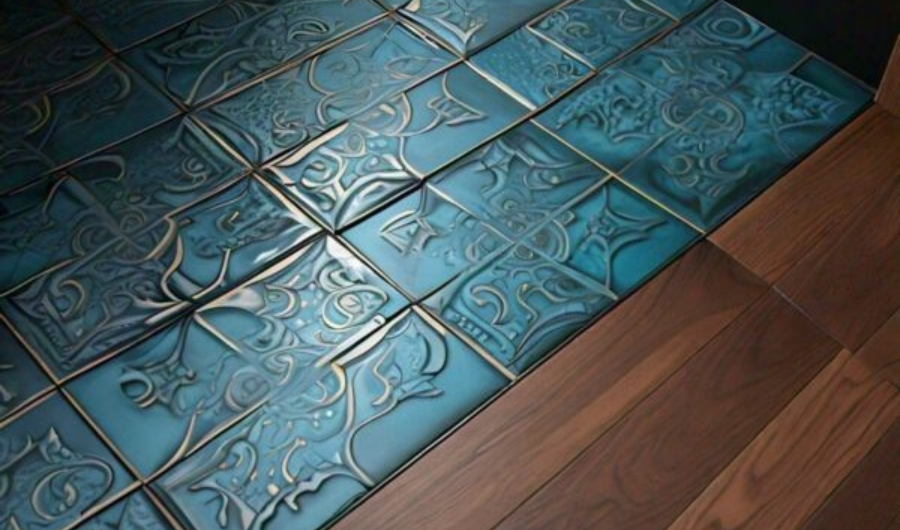
There are various options for transitioning between tile and wood floors in Kitchen, each with its own set of benefits. The height difference between the two surfaces, the overall design appeal, and the level of DIY experience available are all factors that influence the method used.
1. T-Molding
T-molding is one of the most popular and adaptable transition elements. It is T-shaped and fits into the space between the two flooring kinds, effectively bridging the height difference.
- Pros: Easy to install, accommodates slight height variances, and comes in a variety of finishes.
- Cons: Not ideal for large height variations; may necessitate a visible trail.
2. Reducer Strips
Reducer strips are utilized when there is a substantial height difference between the tile and wood floors. They produce a moderate slope from the higher to the lower surface.
- Pros: Ideal for significant height disparities, offers a seamless transition, and comes in a variety of materials.
- Cons: More obvious than T-molding, and may necessitate professional installation for a precise fit.
3. Transition Strips
These strips are flat pieces that can be utilized to cover the transition between two flooring types. They are ideal when the height difference is small.
- Pros: Simple design, quick installation, available in wood, metal, and vinyl.
- Cons: Limited to minor height variances, and may not be as visually pleasing as alternative possibilities.
4. Thresholds
Thresholds are thicker transition elements commonly found in entrances. They make an obvious distinction between two different flooring types.
- Pros: Durable, gives a clear separation, and comes in a variety of materials and finishes.
- Cons: More noticeable than other transition alternatives, and may necessitate professional installation.
Materials and Tools Required
Before beginning the installation process, acquire all necessary supplies and tools. Here’s a checklist to get you started:
- Materials: include T-molding, reducer strips, transition strips, thresholds, glue, screws, nails, and caulk.
- Tools: Measuring tape, saw (hand or miter), hammer, drill, screwdriver, level, rubber mallet, and vacuum or sweeper.
Step-by-Step Guide to Installing a Tile to Wood Floor Transition
Step 1: Measure the Gap
Begin by measuring the gap between the tile and wood flooring. This measurement will help you choose the right type of transition piece and ensure a snug fit.
Step 2: Select the Transition Piece
Based on your measurements and the height difference, select the appropriate transition piece. Make sure to choose a material and finish that complements both the tile and wood flooring.
Step 3: Prepare the Area
Clean the area thoroughly to remove any debris or dust. This will ensure that the adhesive bonds properly and the transition piece sits flush against the flooring.
Step 4: Cut the Transition Piece
Using your measurements, cut the transition piece to the required length. A miter saw is ideal for this task as it provides a clean and precise cut.
Step 5: Dry Fit the Transition Piece
Before applying any adhesive, dry fit the transition piece to ensure it fits correctly. Make any necessary adjustments to the length or angle.
Step 6: Apply Adhesive
Apply a suitable adhesive to the underside of the transition piece. Follow the manufacturer’s instructions regarding the amount and placement of the adhesive.
Step 7: Install the Transition Piece
Carefully place the transition piece into the gap, pressing down firmly to ensure a good bond. Use a rubber mallet to gently tap the piece into place if needed.
Step 8: Secure the Transition Piece
Depending on the type of transition piece, you may need to secure it with screws or nails. If using screws, pre-drill holes to prevent the wood from splitting.
Step 9: Finishing Touches
Once the transition piece is in place, wipe away any excess adhesive and allow it to dry according to the manufacturer’s instructions. If necessary, apply caulk to fill any gaps and create a seamless look.
Design Considerations
![]()
When planning a tile to wood floor transition, take into account your space’s overall design and flow. Here are some suggestions to help you establish a coherent look:
- Color Matching: For a seamless appearance, select a transition piece that closely matches the color of your wood flooring. Alternatively, use a contrasting color to make the transition a design element.
- Texture Coordination: Make sure the texture of the transition piece complements the tile and wood floors. This will help to produce a smooth flow between the two surfaces.
- Width of the Transition: Consider the breadth of the transition component. A wider item might make a more noticeable visual break, whilst a narrower piece can produce a subtle, minimalist impression.
- Pattern Continuity: If your tile or wood flooring has a particular pattern, try to coordinate the transition piece such that the pattern remains continuous.
Common Mistakes to Avoid
To ensure a good tile to wood floor transition, avoid the following frequent mistakes:
- Incorrect Measurements: Accurate measurements are critical. Always check your measurements before cutting the transition piece.
- Ignoring Height disparities: Failure to account for height disparities might result in an uneven transition, posing tripping hazards.
- Poor Glue Application: Using too much or too little glue can impair the stability of the transition piece. For the best results, follow the instructions provided by the manufacturer.
- Rushing the Installation: Take your time with the installation process. Rushing can result in blunders and a substandard finish.
Maintenance Tips
Once your tile to wood floor transition is complete, appropriate maintenance will preserve its longevity and appearance. Here are some strategies to keep it in good shape:
- Regular Cleaning: Sweeping and mopping the transition area regularly will help keep it clean. Avoid using aggressive chemicals that may damage the finish.
- Inspect for Damage: Inspect the transition piece regularly for signs of wear and damage. Address any problems as a way to avoid future worsening.
- Protective Measures: To shield the transition piece from undue wear and tear, place rugs or mats in high-traffic areas.
- Avoid Moisture: Too much moisture can harm the transition piece as well as wood and tile flooring. Spills should be cleaned up right away, and damp, not wet, mop surfaces.
Final Words
Creating a smooth and fashionable tile to wood floor transition is a worthwhile project that may greatly improve your home’s use and aesthetic appeal. You may make a seamless, long-lasting transition that endures by carefully choosing the appropriate transition piece, measuring and cutting precisely, and using the right installation techniques. The information and techniques in this in-depth book will help you become an expert at tile to wood floor transitions, regardless of whether you choose to hire a professional or do it yourself. Savor the change and the enhanced value it adds to your living area.
Related Topic: How to Decorate Floor Tiles