Wood carving is an ancient and gratifying skill that allows you to turn basic pieces of wood into stunning works of art. If you’re a beginner, you may feel overwhelmed at first. However, with some advice and practice, you’ll be able to make your own custom wood carvings in no time. Whether you want to create sculptures, figurines, or other wood things, the process is both rewarding and creative.
In this article, we’ll go over how to get started with wood carving, what equipment you’ll need, and some ideas to make the process easier and more pleasant.
What Is Wood Carving?
Wood carving is the process of cutting and shaping wood to create desired designs. This could be everything from complex sculptures to simple useful objects. The process is ancient and found in many cultures around the world. Mastery involves patience, expertise, and the correct tools.
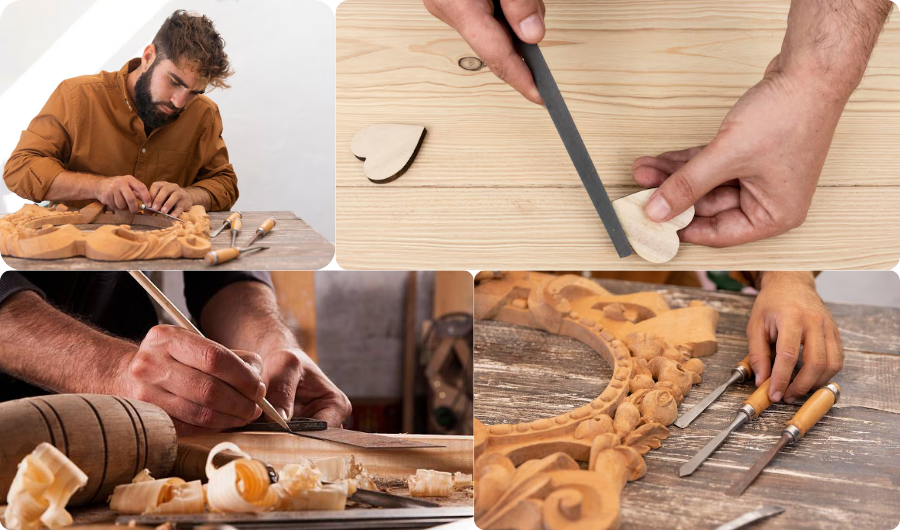
Essential Wood Carving Tools for Beginners
Before starting any project, you must obtain the necessary tools. Here are the basic wood carving tools you’ll require to get started:
- Wood Carving Knife (Straight and Hook Blades) – These are the most common tools for wood carving. Straight blades are perfect for rough cuts, while hook blades are useful for adding curves.
- Gouges – These tools, shaped like chisels, are used to scoop out wood. They’re essential for shaping curved surfaces.
- V-Tools – V-tools are for adding intricate lines and details, especially in areas requiring sharp, clean cuts.
- Mallet – A mallet is used to strike the tools, giving you more control and power when carving.
- Safety Gear – Don’t forget gloves, goggles, and a face mask to protect yourself while carving.
- Sandpaper & Sanding Block – For smoothing out your carving once the rough cuts are made.
- Pencil & Paper – To sketch your designs before transferring them onto the wood.
Step 1: Choose the Right Wood for Carving
Choosing suitable wood is an important step when beginning off. As a novice, you want wood that is neither too hard nor too soft. Too hard, and carving will be difficult. Too soft, and the wood may not retain its shape effectively.
The best wood types for beginners include:
- Basswood – Soft and easy to carve. It holds details well.
- Butternut – A light wood that’s easy to shape and carve.
- Cedar – Lightweight wood and often used for carvings with a smooth finish.
Step 2: Start with Simple Designs
Begin with simple carvings before progressing to more intricate designs. Consider basic shapes, such as animals, foliage, or abstract patterns. Keep your first project simple, as larger pieces can be daunting.
Start by drawing your design on paper. This enables you to modify the design prior to printing it onto wood. After you are satisfied with the sketch, use a pencil to copy it onto your piece of wood.
Step 3: Secure the Wood
Before carving, the wood must be securely fastened. Hold your wood in place using a vice or clamps. This makes it easy to carve and guarantees that the item remains motionless while you work, avoiding mishaps.
Step 4: Rough Carving
It’s time to begin carving now that your wood is safe. Start by outlining the basic shape using crude cuts. To cut away extra wood surrounding the design, use a bigger carving knife or gouge.
Don’t bother about perfecting the details at this point. Concentrate on determining the shape of the thing.
Step 5: Refining Your Carving
Once you’ve created a rough sketch, use smaller tools to refine your design. Begin to carve finer details like curves, lines, and texture. V-tools produce sharper lines, while gouges produce smoother curves.
As you work on the shape, make minor cuts to improve the depth and form. Take your time and be patient, as delicate details necessitate precise effort.
Step 6: Adding Depth and Detail
Depth is what brings wood carvings to life. To add depth, concentrate on places that should appear deeper than others. Use gouges and carving knives to remove small portions of wood, resulting in shadows and depth in your design.
For finer details, use smaller tools. As you advance, you’ll add facial characteristics, textures, and intricate patterns to bring the carving to life.
Step 7: Sanding and Smoothing
Once you’re satisfied with the shape and details of your carving, it’s time to smooth out any rough spots. Begin sanding the wood with medium-grit sandpaper. To attain a smooth, polished finish, gradually progress to finer sandpapers.
Sanding not only smoothes the surface, but it also eliminates any sharp edges or defects in your carving.
Step 8: Finishing Your Carving
Once your carving is smooth and the design is complete, it’s time to finish. Apply the wood finish of your choosing. Options include:
- Wood Varnish – Adds a protective layer and gives your carving a glossy finish.
- Wood Stain – Adds color while maintaining the natural texture of the wood.
- Natural Oils – Oils like linseed oil bring out the wood’s natural grain and provide a protective layer.
Let the finish dry completely before handling your carving.
Step 9: Displaying and Maintaining Your Carving
Your carving is now complete! Here’s how to take care of it:
- Display: Place your carving in a location that’s not exposed to direct sunlight or extreme humidity. This helps preserve the wood and the finish.
- Cleaning: Dust your carving regularly with a soft brush or cloth to keep it looking fresh.
- Re-finishing: If the finish wears off over time, you can reapply a fresh coat to protect the wood.
Keep Practicing and Have Fun!
Wood carving is an enjoyable and creative technique that takes time to master. Do not be discouraged by your initial blunders. The more you carve, the better you will get. As a novice, concentrate on enjoying the process and progressing at your own pace.
With practice, your skills will develop, allowing you to produce more complicated and beautiful carvings. Remember to begin with modest projects and work your way up.
FAQs
1. What’s the best wood to start carving?
Basswood, butternut, and cedar are the best woods for beginners. They are soft and easy to carve.
2. Do I need expensive tools to start carving?
No, you don’t need expensive tools to begin with. Look for a basic wood carving kit with a few essential tools.
3. How long does it take to finish a wood carving?
It depends on the size and complexity of your project. For beginners, a simple carving could take a few hours to a couple of days.
4. Can I carve with just a knife?
Yes, you can use just a wood carving knife for simple projects, but gouges and V-tools are helpful for more intricate details.
5. How do I keep my carving tools sharp?
Use a sharpening stone or strop regularly to maintain the sharpness of your tools. It helps ensure clean cuts and easier carving.