Using a floor stripper may seem intimidating if you are new to floor maintenance or renovation, but when approached with the right information and preparation, it becomes a powerful way to renew your floors. Whether you are preparing a commercial space for new flooring, restoring old surfaces, or removing stubborn finishes, this guide will walk you through everything you need to know to use a floor stripper safely and effectively for various floor types.
This article will explain what a floor stripper is, the situations in which you might need it, how to choose the right stripper for your floor type, and the steps you need to take for a successful project. It will also cover important safety considerations and how to handle common challenges that arise on the job.
Floors are one of the most visible parts of any room. When they are worn, stained, or coated with old finishes, they can make the whole space look tired. Using a floor stripper is often the first step toward updating the look of your space. Many homeowners and professionals rely on this tool and chemical solution to clear away wax, sealers, coatings, or adhesive residues left behind by other materials.
Before we dive in, it may help to understand the broader context of flooring products and solutions. For example, if you are planning to install a new material after stripping, it helps to consider options for durable surfaces like peel and stick vinyl flooring or to see what kind of underlayment works best for vinyl floors. Thinking ahead about your final surface can make your stripping process more strategic.
What Is a Floor Stripper and Why Use One
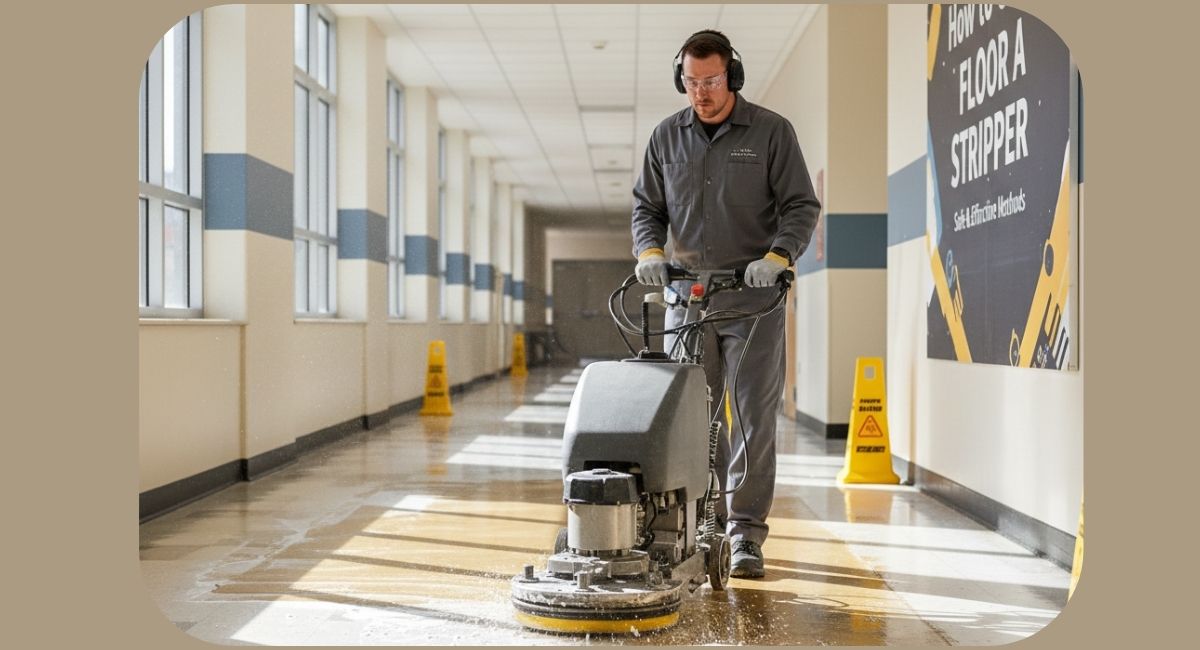
A floor stripper is both a tool and a chemical solution used to remove layers of old finishes on floor surfaces. The tool itself is usually a mechanical device that helps scrape or lift softened material, while the chemical stripper is a formulation designed to break down waxes, sealers, coatings, or adhesives at the molecular level so they can be removed more easily.
Floor strippers are needed when:
- The finish on a floor has deteriorated, become uneven, or formed buildup over time.
- You are preparing a floor surface for a new finish or covering.
- You want to remove stubborn coatings that cannot be cleaned with standard cleaning methods.
- Adhesives from old vinyl, tile, or carpet need to be lifted before new flooring can be installed.
Different floors react differently to stripping methods, and the type of finish or coating greatly influences the approach you take. Porous surfaces like concrete behave differently from sealed wood, and delicate materials like natural stone need extra care.
Types of Floor Surfaces and How They Respond to Stripping
Every floor type has its own properties and vulnerabilities, so the way a floor stripper works on one surface might not work—or might even cause damage—on another.
Concrete
Concrete is among the most robust surfaces, but it can be highly porous. Sealers, paints, or adhesives can penetrate deep into a concrete floor, meaning stripping often involves heavy‑duty chemical solutions and mechanical action.
When stripping concrete:
- Use a solution formulated for concrete to prevent incomplete removal.
- Work in sections to avoid letting the chemical dry before you can scrape it.
- Rinse thoroughly so no residue remains that could affect future coatings.
Concrete floors are often covered with protective coatings, epoxy layers, or paint, and a successful stripping job makes a dramatic difference in surface quality.
Vinyl Composition Tile and Sheet Vinyl
Vinyl surfaces are popular because they are durable and easy to clean, but they often have wax or finish layers applied regularly. These layers build up over time, becoming cloudy and dull.
For vinyl surfaces:
- Use a floor stripper that is rated safe for vinyl.
- Avoid overly aggressive scrapers that can gouge or scratch the material.
- Follow the stripper with proper rinsing and neutralizing steps.
If you plan to remove the vinyl entirely, you may also encounter adhesive residue, which may require a stronger stripping approach or heat‑assisted removal.
Hardwood
Hardwood floors are often sealed and then finished with products like polyurethane. Stripping these floors to bare wood requires many of the same principles used for concrete, but with gentler touch and careful chemical selection.
For hardwood:
- Consider whether sanding might be an alternative to chemical stripping, especially if you are removing surface finishes.
- If using a chemical stripper, choose one that is safe for wood and follow the instructions closely.
- Test a small area first to ensure it does not raise the grain or cause discoloration.
Hardwood floors that will be refinished benefit from careful moisture control and proper drying.
Tile and Natural Stone
Tile and stone are resilient but can stain easily from chemicals. Stripping finishes on these surfaces usually involves a mild stripper and minimal mechanical action.
For these materials:
- Choose a stripper intended for stone or tile if available.
- Avoid harsh abrasive tools that can scratch the surface.
- Rinse thoroughly with clean water.
It is important to check the chemical compatibility to avoid etching or dulling the surface.
Preparing Your Space for Stripping
Preparation is one of the most significant parts of the process. A well‑prepared workspace saves time and prevents accidents.
First, clear the room of furniture, rugs, and any fixtures that can be moved. Sweep or vacuum the floor to remove debris that might interfere with stripping.
Next, ensure proper ventilation. Many floor strippers contain chemicals that can produce strong vapors. Open windows, use box fans, and set up positive airflow from outside if possible.
Protect surrounding surfaces such as baseboards, walls, and door frames. Use painter’s tape or plastic sheeting to guard these areas from splashes.
Protect yourself. Wear protective gloves, eyewear, and long sleeves. If you are working with strong chemicals, a respirator mask rated for organic vapors may be necessary.
Finally, read the manufacturer’s instructions on both the stripper tool and the chemical solution. Each product has specific directions that can affect performance and safety.
Step‑by‑Step Guide to Using a Floor Stripper
The following steps offer a general framework for using a floor stripper effectively. Always follow the specific instructions provided by the product you are using, and adjust these steps to accommodate the type of floor surface you are working with.
- Test a Small Area
Before applying any chemical stripper to the entire floor, choose a corner or hidden area to test. This test spot shows how the floor reacts and whether additional precautions are needed. - Apply the Chemical Stripper
Using a mop, brush, or applicator, spread the chemical floor stripper in a thin, even layer. Work in manageable sections—usually about 4 to 6 square feet at a time. - Let it Soak
Allow the stripper to sit according to the manufacturer’s directions. This soaking period softens the finish or adhesive so that it can be removed more easily. - Use the Floor Stripper Tool
Once the finish has softened, begin working with your floor stripper tool. Move slowly and methodically, maintaining even pressure to lift the material without damaging the surface beneath. - Scrape and Collect Removed Material
As you lift the finish, use a scraper or squeegee to push the removed material into piles for collection. Use buckets, plastic, or a wet vacuum to gather the debris efficiently. - Rinse the Floor
After the majority of the finish is removed, rinse the floor with clean water to remove any lingering stripper solution. On concrete and vinyl, repeat rinsing until the water runs clear. - Neutralize if Required
Some chemical strippers require a neutralizing solution after rinsing. Check the product instructions and apply a neutralizer if necessary to prevent issues with future coatings. - Final Cleanup and Drying
Allow the floor to dry completely. For wooden surfaces, encourage airflow to speed drying and prevent moisture damage.
Safety Tips You Should Know
Using a floor stripper involves both chemicals and mechanical tools, so safety must be a priority.
- Wear protective gear at all times. Gloves, eye protection, and long sleeves help shield your skin and eyes.
- Ensure adequate ventilation. This may mean running fans and keeping doors open for airflow.
- Never mix chemical products. Mixing different chemicals can create dangerous reactions.
- Read all product labels. Safety instructions on products are there to protect you and explain hazards.
- Keep children and pets away from the workspace until it is clean and safe.
Troubleshooting Common Issues
Even with careful planning, challenges can appear. Here are some common problems and how to address them.
Finish Not Softening
If the chemical stripper does not soften the finish, it may not be compatible with that coating. Try a different stripper formulated for tougher finishes, or allow more dwell time within the guidelines.
Chemical Burns or Irritation
If you experience irritation, stop immediately. Increase ventilation, remove yourself from the area, and wash exposed skin with soap and water. Use stronger protective gear before resuming.
Residue Remains After Rinsing
Incomplete rinsing can leave residue that interferes with new finishes. Repeat rinsing with clean water and use a neutralizer if recommended.
After the Stripping Process
Once the stripping is complete and the floor is fully dry, you may be preparing to install new flooring or apply a fresh finish. For example, if you are considering new surface options for your space, look into affordable flooring options that match your design goals and budget.
If you have hardwood floors that need refinishing, a thorough inspection after stripping will show you what level of sanding or repair is needed. For concrete floors, you may decide between staining, polishing, or coating with a protective layer such as epoxy.
Environmental and Disposal Considerations
Disposing of old floor finishes and chemical solutions requires care. Do not pour leftover stripper or contaminated rinse water down drains or into soil. Check local regulations for safe disposal methods. Many areas have hazardous waste collection programs that accept leftover chemicals and contaminated rags.
When to Ask for Professional Help
Some situations are well within the reach of a DIY project, but others benefit from professional experience. Call in a professional if:
- The space is large and logistics of ventilation and cleanup are beyond your setup.
- The finish is extremely old or stubborn and resists standard stripping methods.
- The floor is delicate natural stone that could be damaged by chemical or mechanical action.
- You have health concerns about working with chemical strippers.
Professionals bring tools, experience, and methods that minimize risk and complete the job efficiently.
Using a floor stripper effectively requires patience, attention to detail, and respect for safety. With these methods and best practices, you can approach your project with confidence, knowing you are prepared to restore your floors for whatever comes next.
If you want more inspiration for home improvement and floor care ideas, check out wet floor sign tips and safety guidance to keep workspaces safe during projects. You might also enjoy reading about Shaw carpet choices and care to round out your flooring knowledge.
Using practical steps, attention to safety, and the right tools and products, you can achieve a clean slate for your floors and prepare them for a fresh new look. For more flooring ideas and guidance, visit the home page of ByBGoodIdea, where you will find more helpful articles and resources to support your projects.